Normally whenever your integration grows to become bigger than a very basic one, it’s a good idea to split the logic into small reusable pieces of work. Enter Workato Recipe Functions.
Workato functions are a type of recipe that acts as their name indicates, a sub-recipe that can be used from other recipes to implement a certain highly cohesive logic that could be reusable across recipes, or at least, to simplify the main recipe and make it more readable, organised, and maintainable. Very similar to the concept of functions in any programming language, recipe functions are Workato’s implementation of this concept.
Use Case
In this article, we’ll showcase creating a recipe with several internal calls to recipe functions. The recipe will retrieve some shipment confirmation information from an external API, process and map this information into a csv format, then finally store this csv in Workato’s File Storage service. We’ll create three recipe functions to perform these three logical operations. Let’s go
Step 1: Create the Get Shipment Confirmations Recipe Function
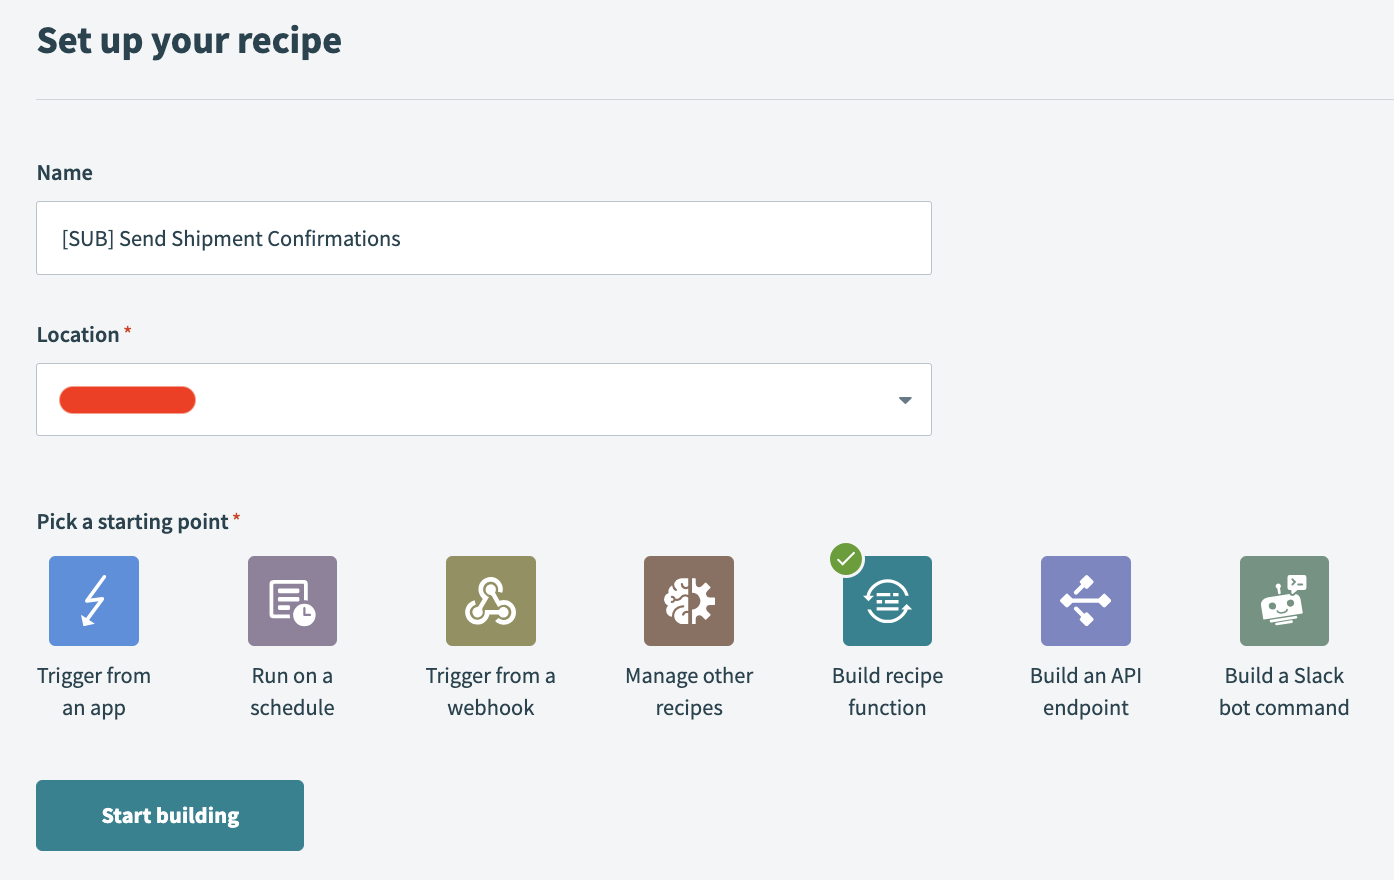
First step is to create the Get Shipment Confirmations function. To do that we have to create a recipe, then specify the type as a function as shown below

For every recipe function, we have to define an input and output, then do our implementation. This one will only call the external API in the middle and return the response. This function will not need an input, so we’ll only define a string output as shown below.

Step 2: Create the Process Shipment Confirmations Recipe Function
Second step is to create the function that will process the API response and create a CSV-like structure. To do that go on and create another recipe, and specify the type as a function similar to what we did in the first function

This time we’ll have to define an string input field, and a string output field. Most significant logic in this function is to use the Compose CSV Action to generate a CSV structure as shown below:
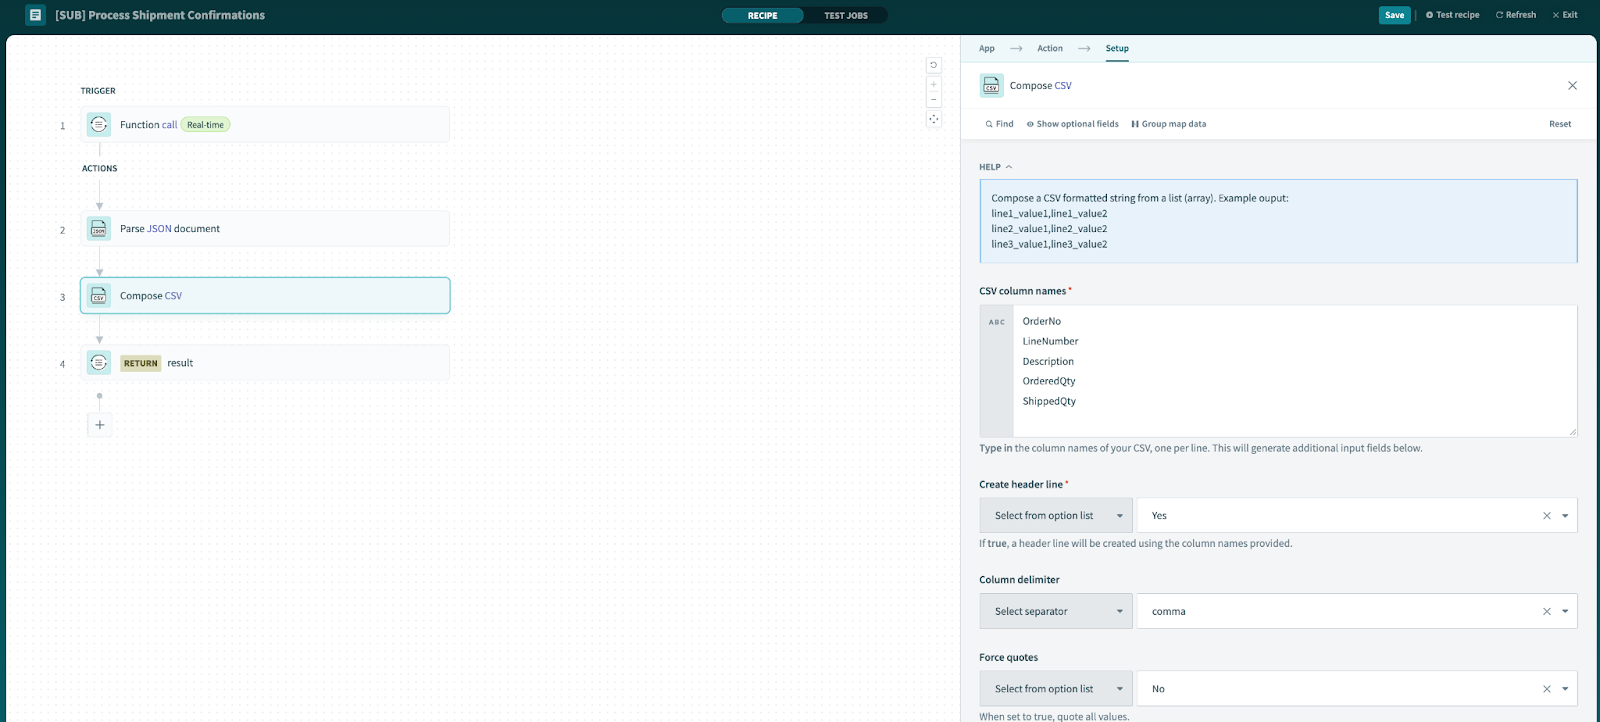
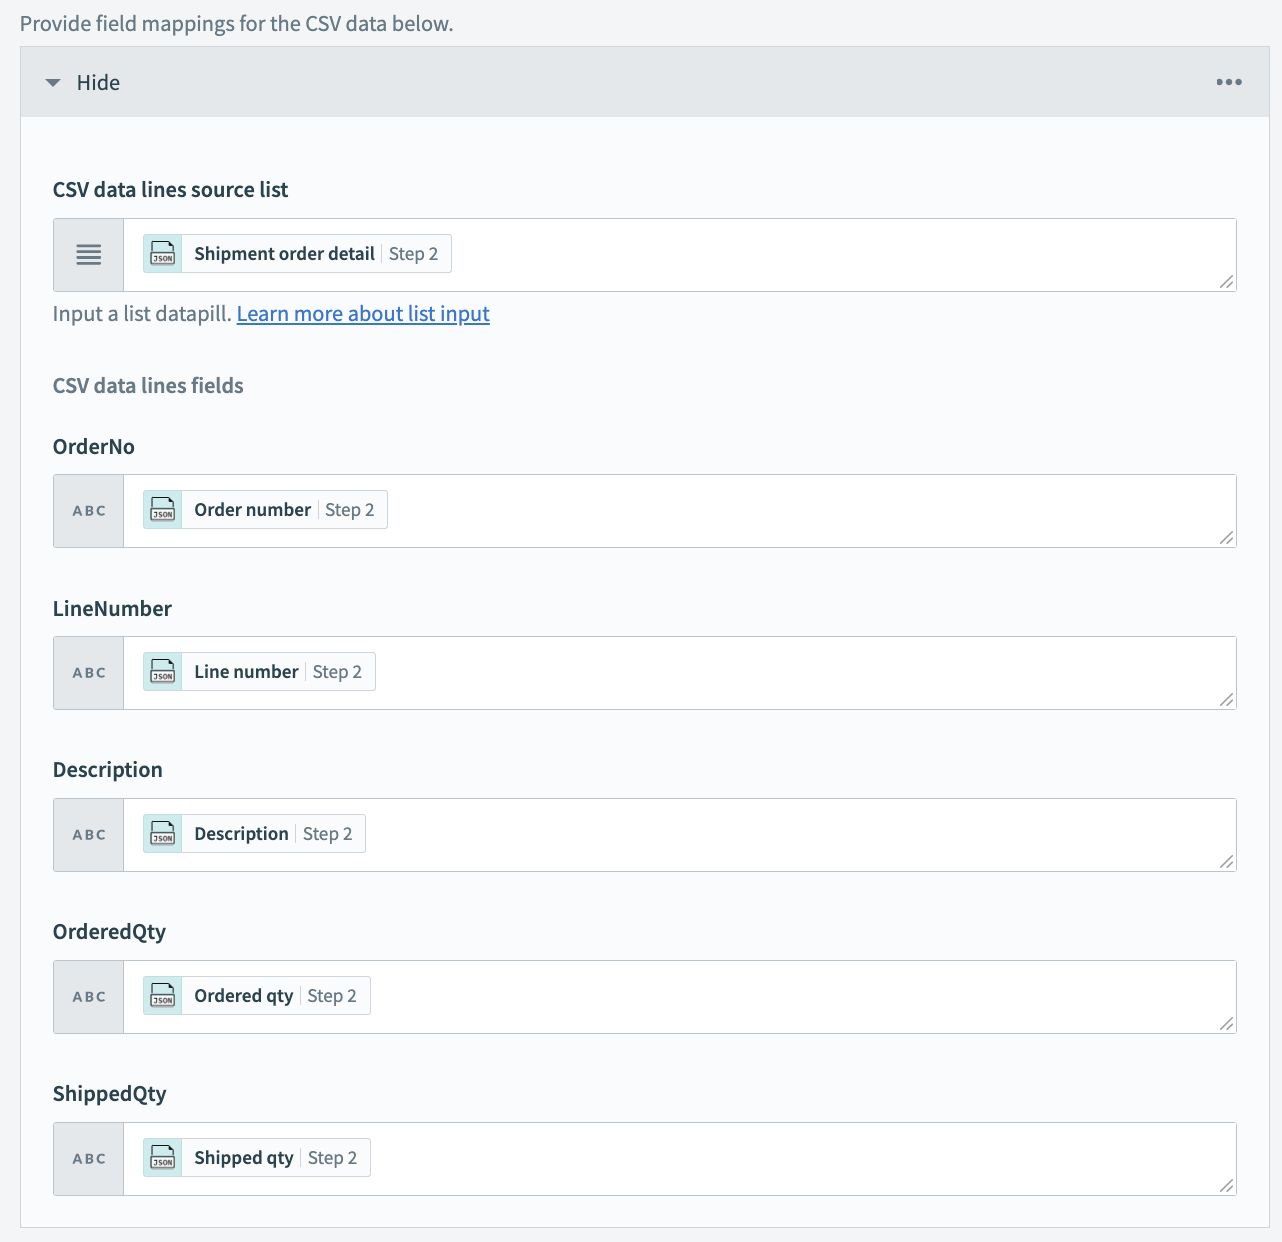
In this action, we define the mappings:
Step 3: Create the Send Shipment Confirmations Recipe Function
Similar to the other functions, create the one that will be responsible to persist the transformed data
This one only defines an input (no output), and the implementation only uses the Workato File Storage service to save the file

Step 4: Start all Recipe Functions
For the functions to be usable, we need to make sure they are all started. Let’s do that as shown below:

Step 5: Create the Main Recipe
Finally, it’s time to create the main recipe which will call the previously created functions. This time set the starting point to “Run on a schedule” rather than a “Build a recipe function”

Use the Recipe Function by Workato action to call the three functions as shown below:

Test the Recipe
Now that the implementation is completed, hit that “Test Recipe” button in the top right corner to test the recipe. You should get something like the below
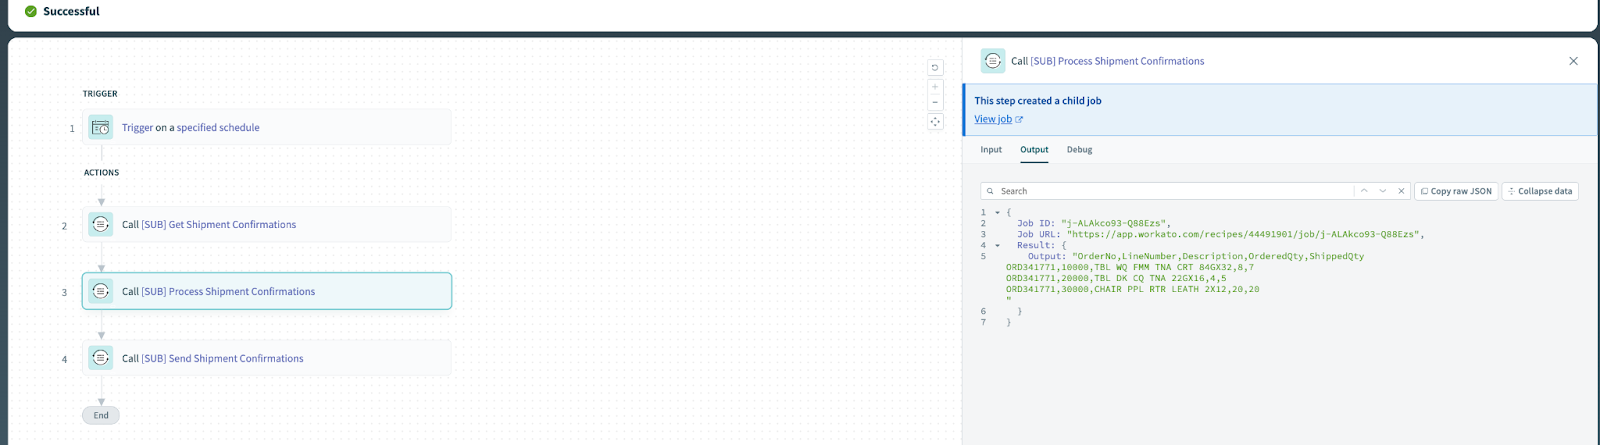
You can click on each action to view the inputs, outputs, and any debug information.

Finally, navigate to the file storage and you should be able to view the persisted file there

Conclusion
In the article, we’ve explained the difference between a recipe and a recipe function and explained the benefits of using recipe functions. As usual, we’ve gone, on a high level, through a practical example leveraging recipe functions. If you are interested in a detailed, step-by-step tutorial on how to create a recipe, check out our previous article Creating your First Workato Integration
Pingback: API Paging in Workato
Pingback: Sorting and Grouping Data in Workato