Article Goal: Create the GenerateId and SendEmail Azure Functions.
As part of our scenario, we need two functionalities which can be achieved using Azure Functions. First, when we pick up a message in our Logic App, we need to generate an ID for the message in case the message was for customer creation. This ID generation requires custom code, thus, the Logic App will call on a function to achieve this. Second, if any business / technical error occurs, we decided to handle that by sending an email. Also, an Azure Function can do that, but we’ll use the function is a different way this time. To ensure guaranteed delivery, we’re going to put the message into a service bus queue (the one we already created in the previous article), and let the Azure function listen to that queue, which showcases another feature of Azure Functions. Ready to roll? Let’s go…
Azure Functions allows us to run custom code on the cloud paying only for the time your function runs. We can write functions in multiple languages such as C#, Node.js, Python, and PHP. The most important thing to know is that functions have a URL, hence can be called using an HTTP request (as what we’ll do in the Logic App). Also, functions can start based on triggers (events) such when a message is written to a service bus topic or queue (as what we’ll do in the send email function). For detailed information about Azure Functions, you can go to https://docs.microsoft.com/en-us/azure/azure-functions
Let’s start by creating the GenerateId function. On the DEV-IPAAS-RG home blade, click +Add action on the top menu, search for Function App, select it, then click “Create”

Set the fields as below, and click “Create”. Note that the Function App can contain multiple functions, hence, we will place both of our functions in the same Function App

Again, make sure you include the environment name as part of the Function App name as this name should be globally unique and will differ across environments. Also, set the location to the same location as the Resource Group and the storage account to the account created previously. The Function App requires a storage account in order to store the Function App files. Thus, select the previously created storage account (used for storing configurations) rather than creating another storage account just for this Function App. This will use the blob feature of the storage account (we have used the tables feature in the previous article)
The Function App will be provisioned and after finishing, you can view it among other artifacts under our resource group

Click on the Function App (ipass-functions-dev) to navigate to the App home page

Creating the generateId Function
Click on +New Function to create a new function. Select “HttpTrigger-Javascript” from the available templates, name the function “generateId”, leave the Authorization Level to “Function”, and click “Create”

Once the function is created, the code view will open and we can write code to return the value we want

My intention is to generate an id with the format: {entityname}-YYYYMMDDHHMMSSMS, which is a dummy format, but the goal here is just to write some custom code to showcase the usage of a function. So, let’s change the function code as follows:
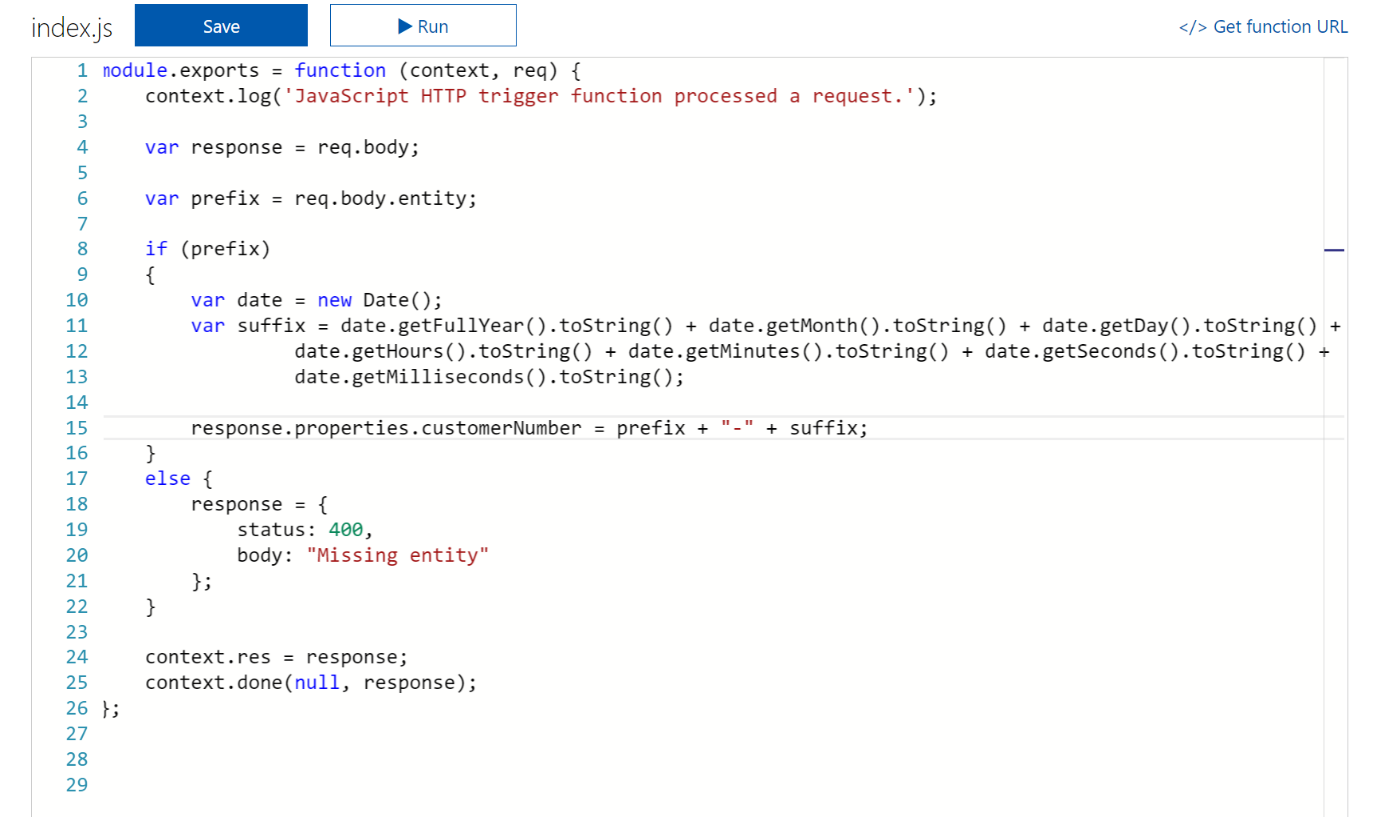
Here we are checking if the entity field exists in the request. If yes, we are appending it to a full date format and returning the generated id injected in the request received to the function. Else, we are returning a Bad Request. Nothing much…
To test the function, let’s click on the Test link in the right pane actions, paste our request defined in the first article, as this is the request I’m intending to send to the Azure function, then click “Run”. The function will return a status 200 HTTP code with the full request received along with the generated id.

Creating the sendEmail Function
The second function we’re going to create is the send email one. This function will be triggered whenever a message is written to a service bus queue. We will write built-in .net classes to send the email.
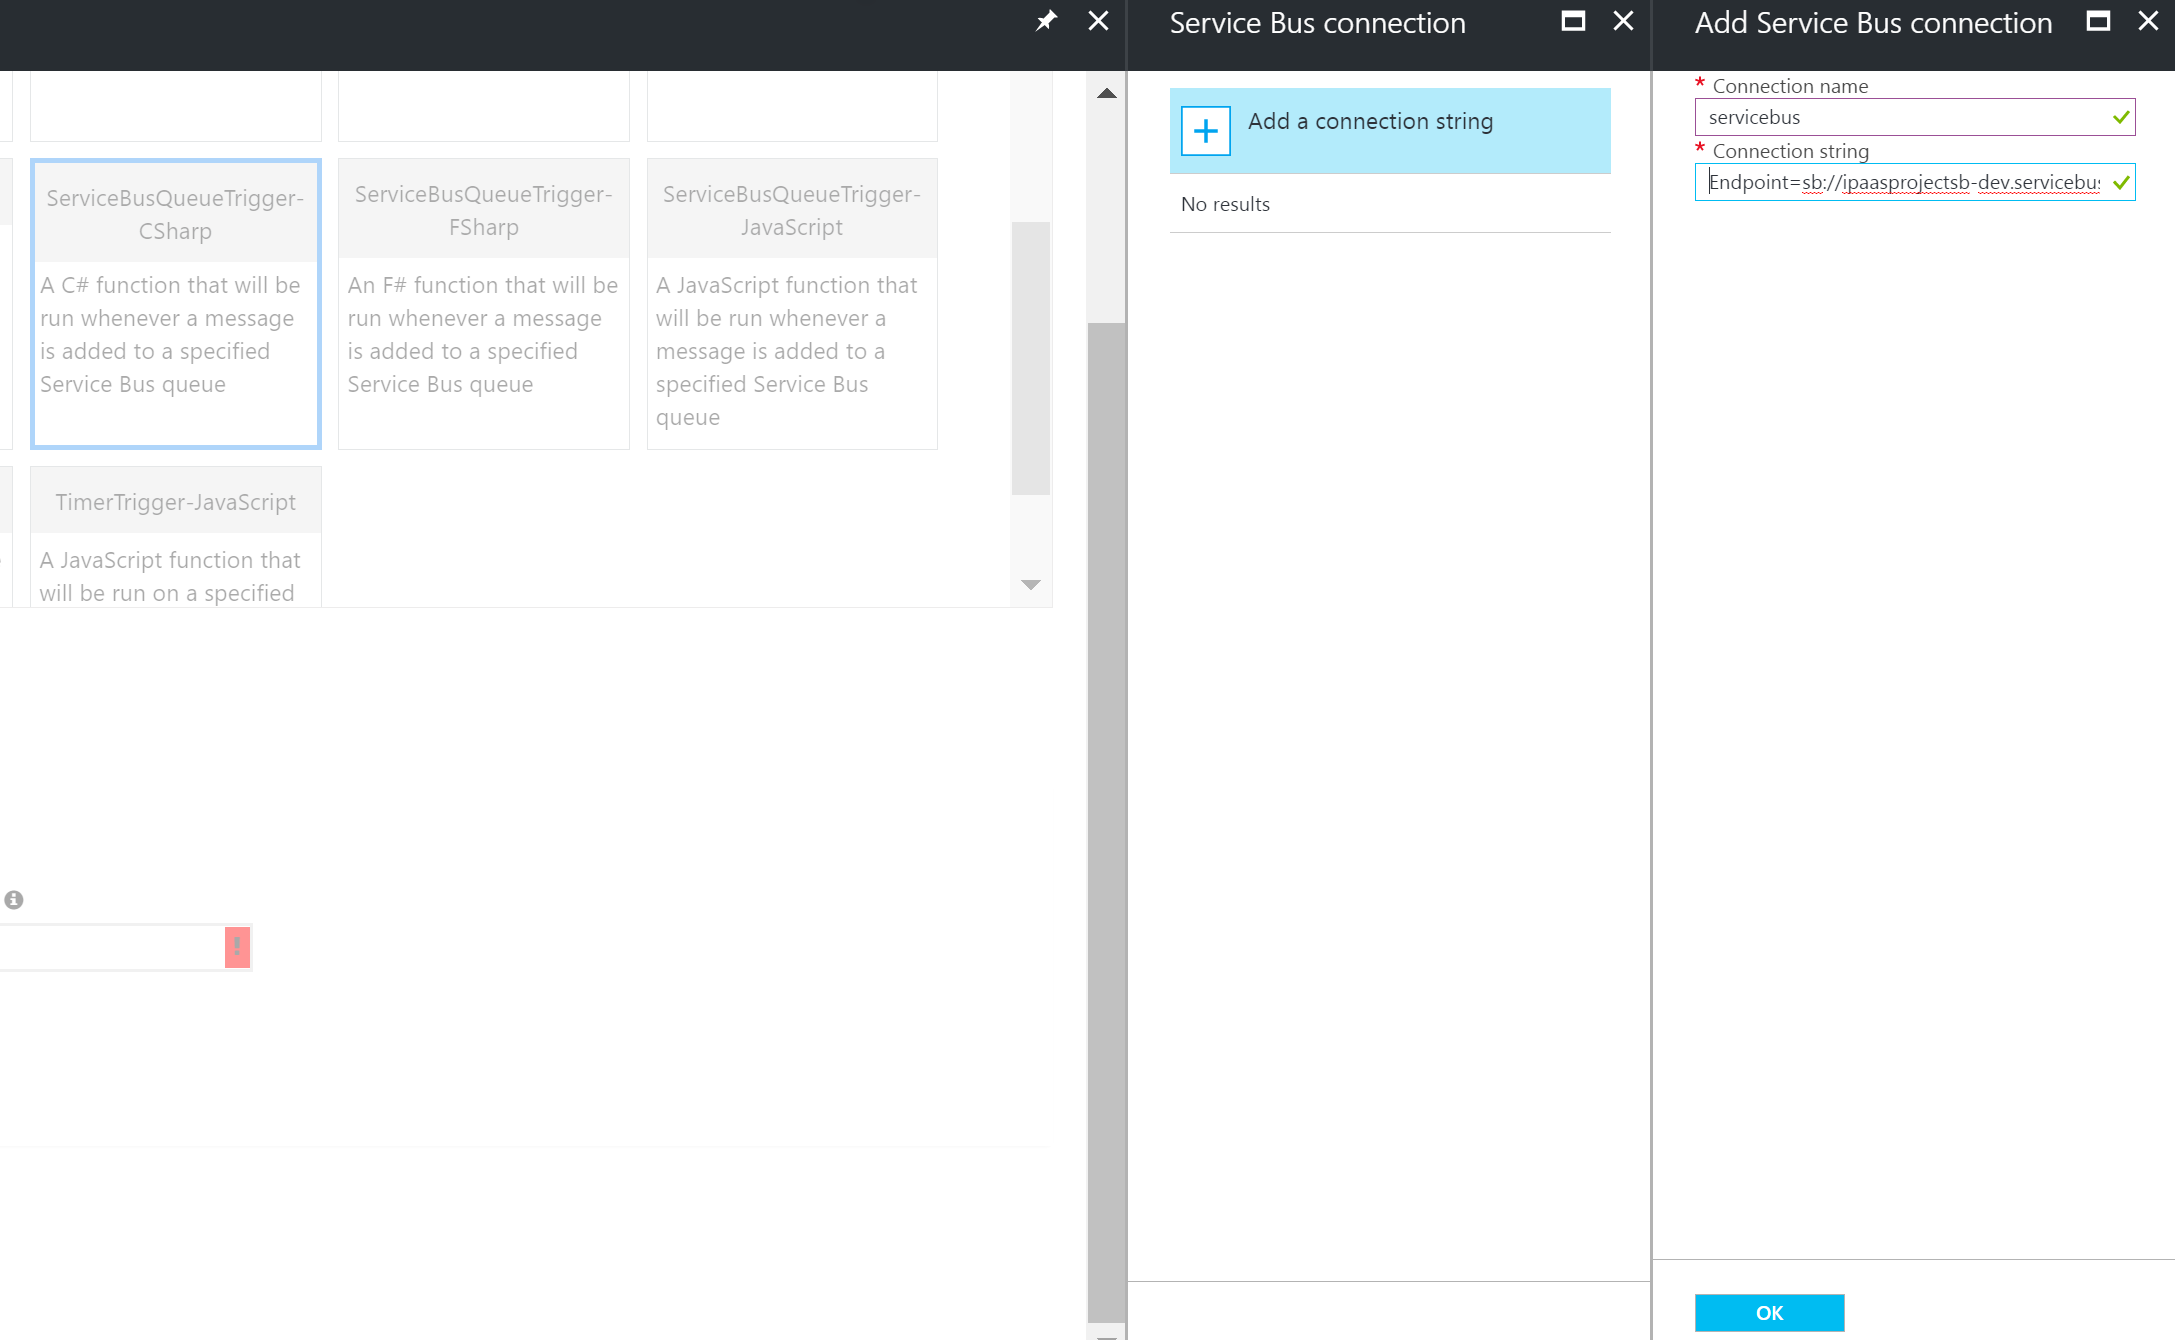
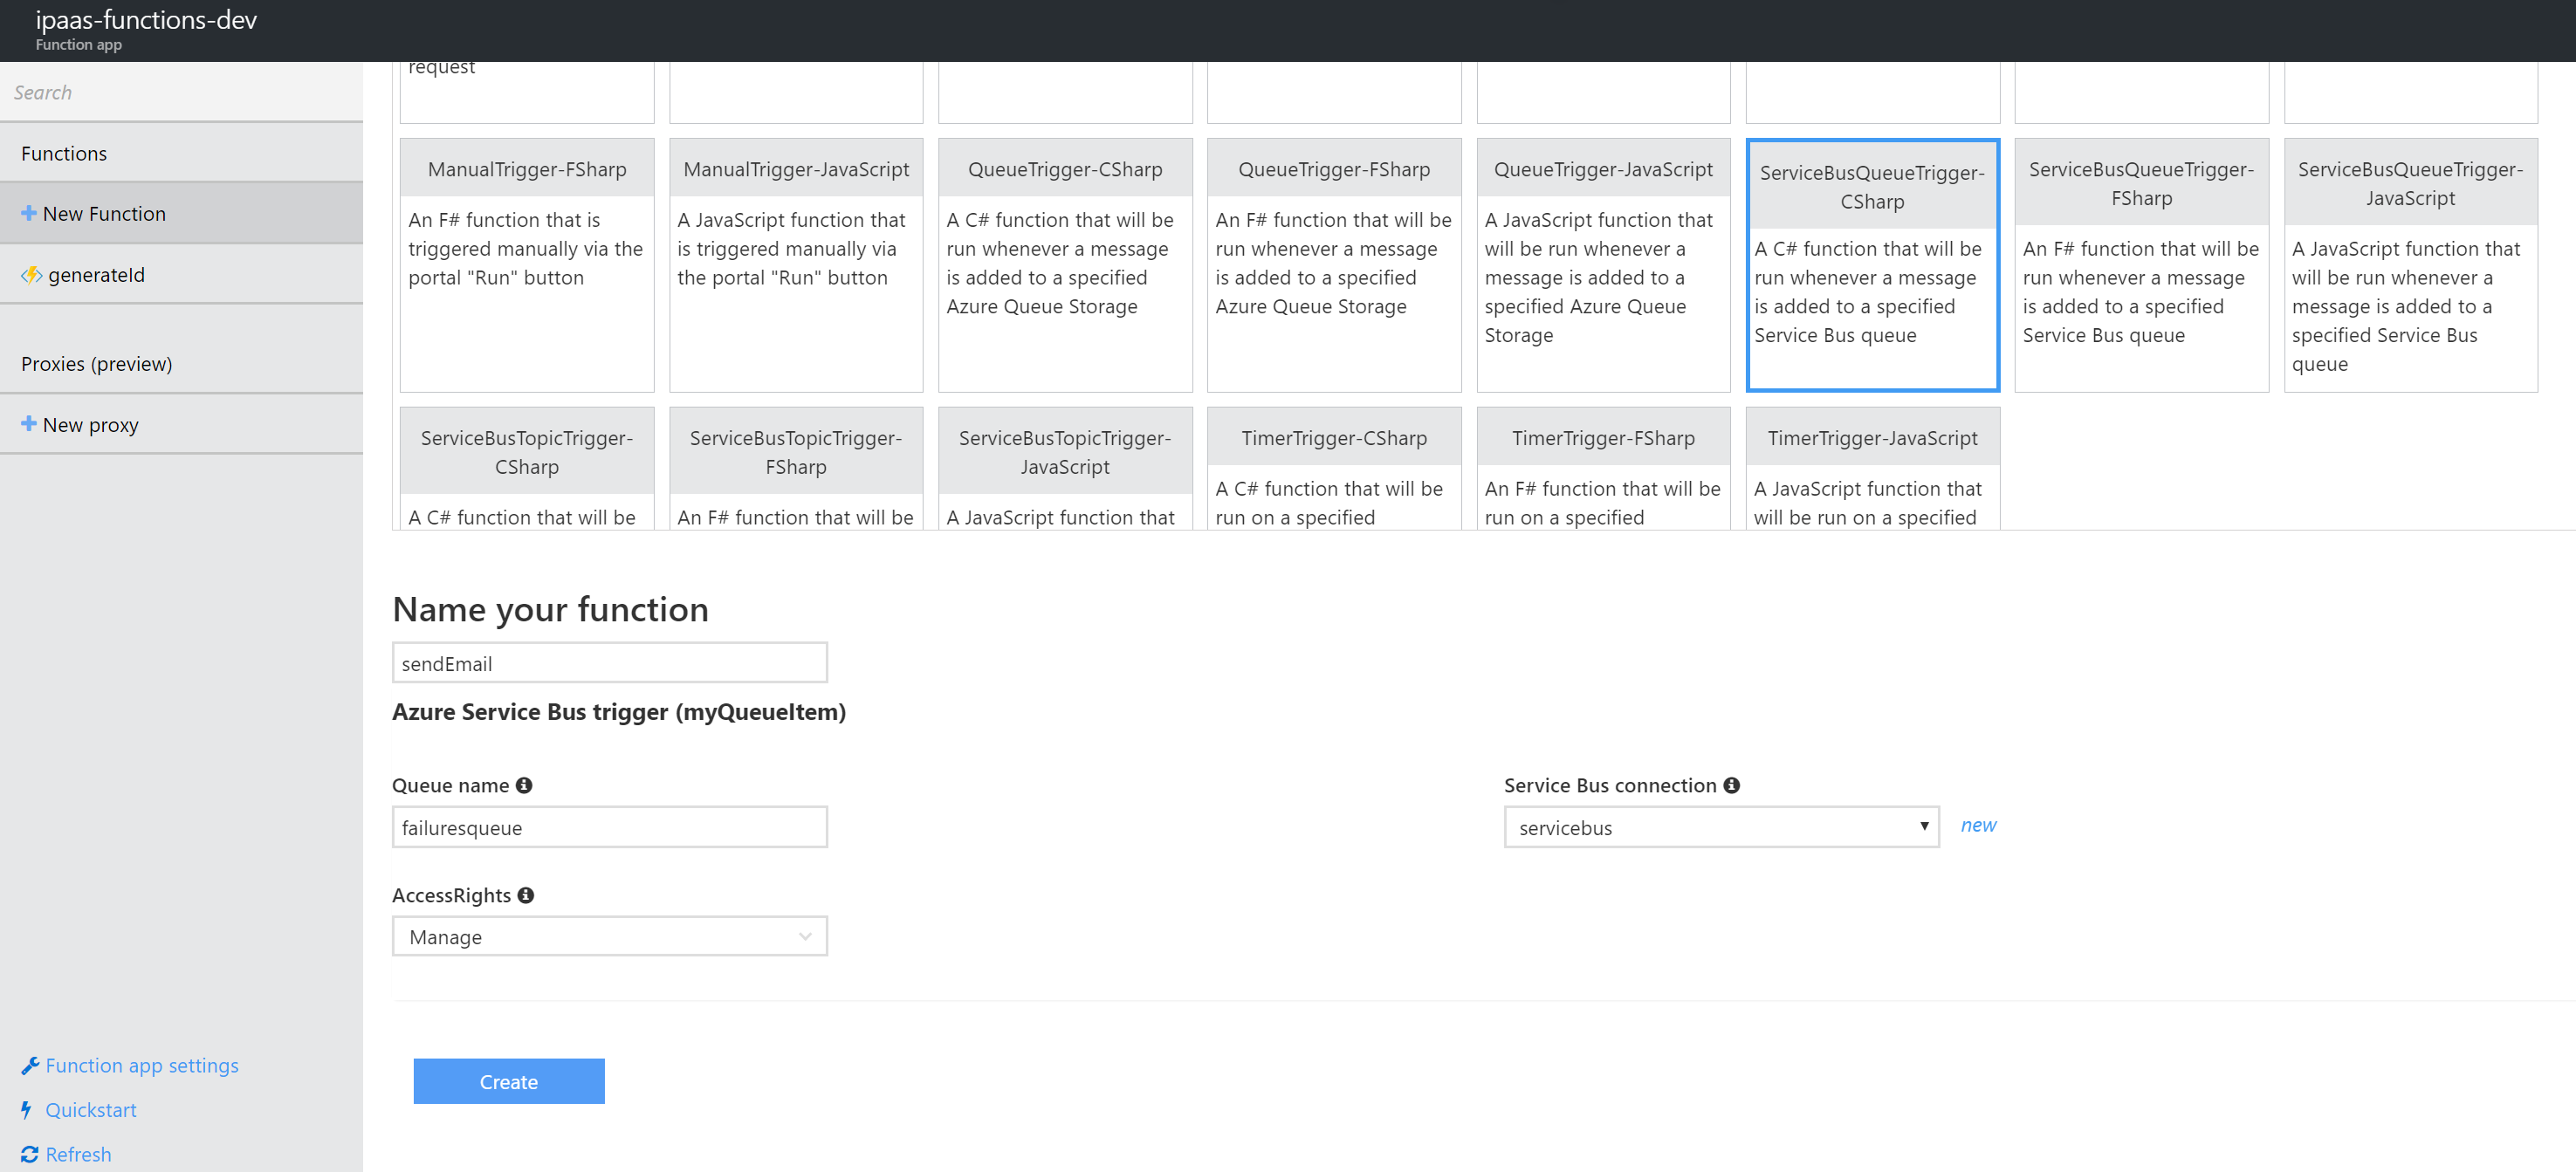
As in the previous step, in the Function App main blade, click the +New Function to create a new function. Select ServiceBusQueueTrigger – Csharp from the “Choose a template” list, set the name of the function and the queue name which we created towards the end of the service bus article. Also, click “New” next to the Service Bus connection field, select “Add a connection string”, then enter servicebus as the connection name and the service bus connection string we noted in the service bus previous article in this series. Once done, click “Ok”
The final screen will look like the below
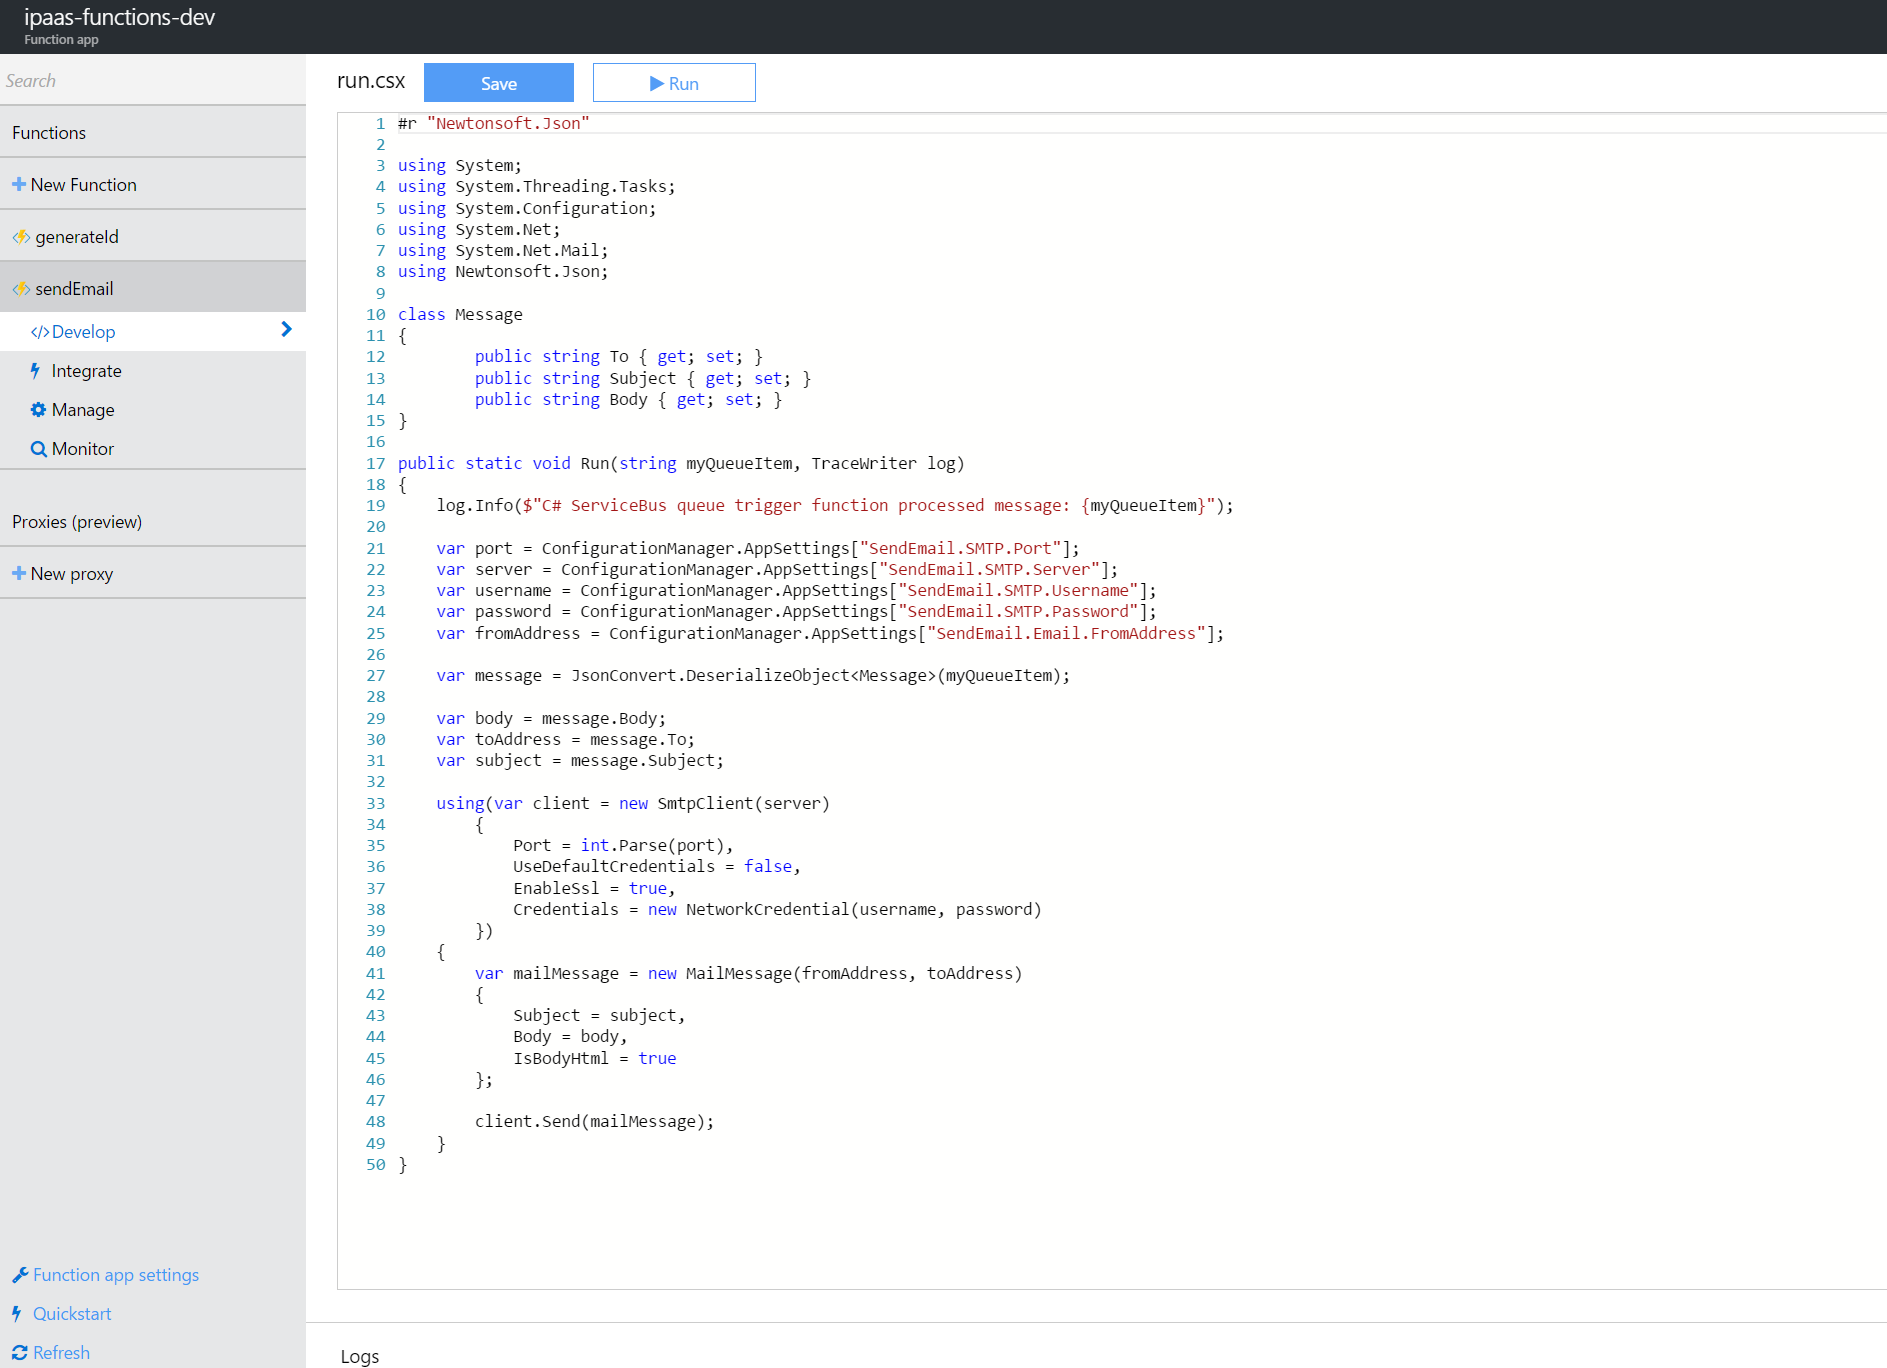
Click “Create” to create the function. Once created, the default code view will open as follows:

Replace the code by the below code and click “Save”
Note that some variable values are being retrieved from the configuration file as those might change. Let’s go to the configuration file and add those settings. Click “Function app settings” on the bottom left corner of the screen then next to “Application Settings”, click the button “Configure App Settings”. Add the application settings we used, set their values, then click “Save”. The final screen should look like:

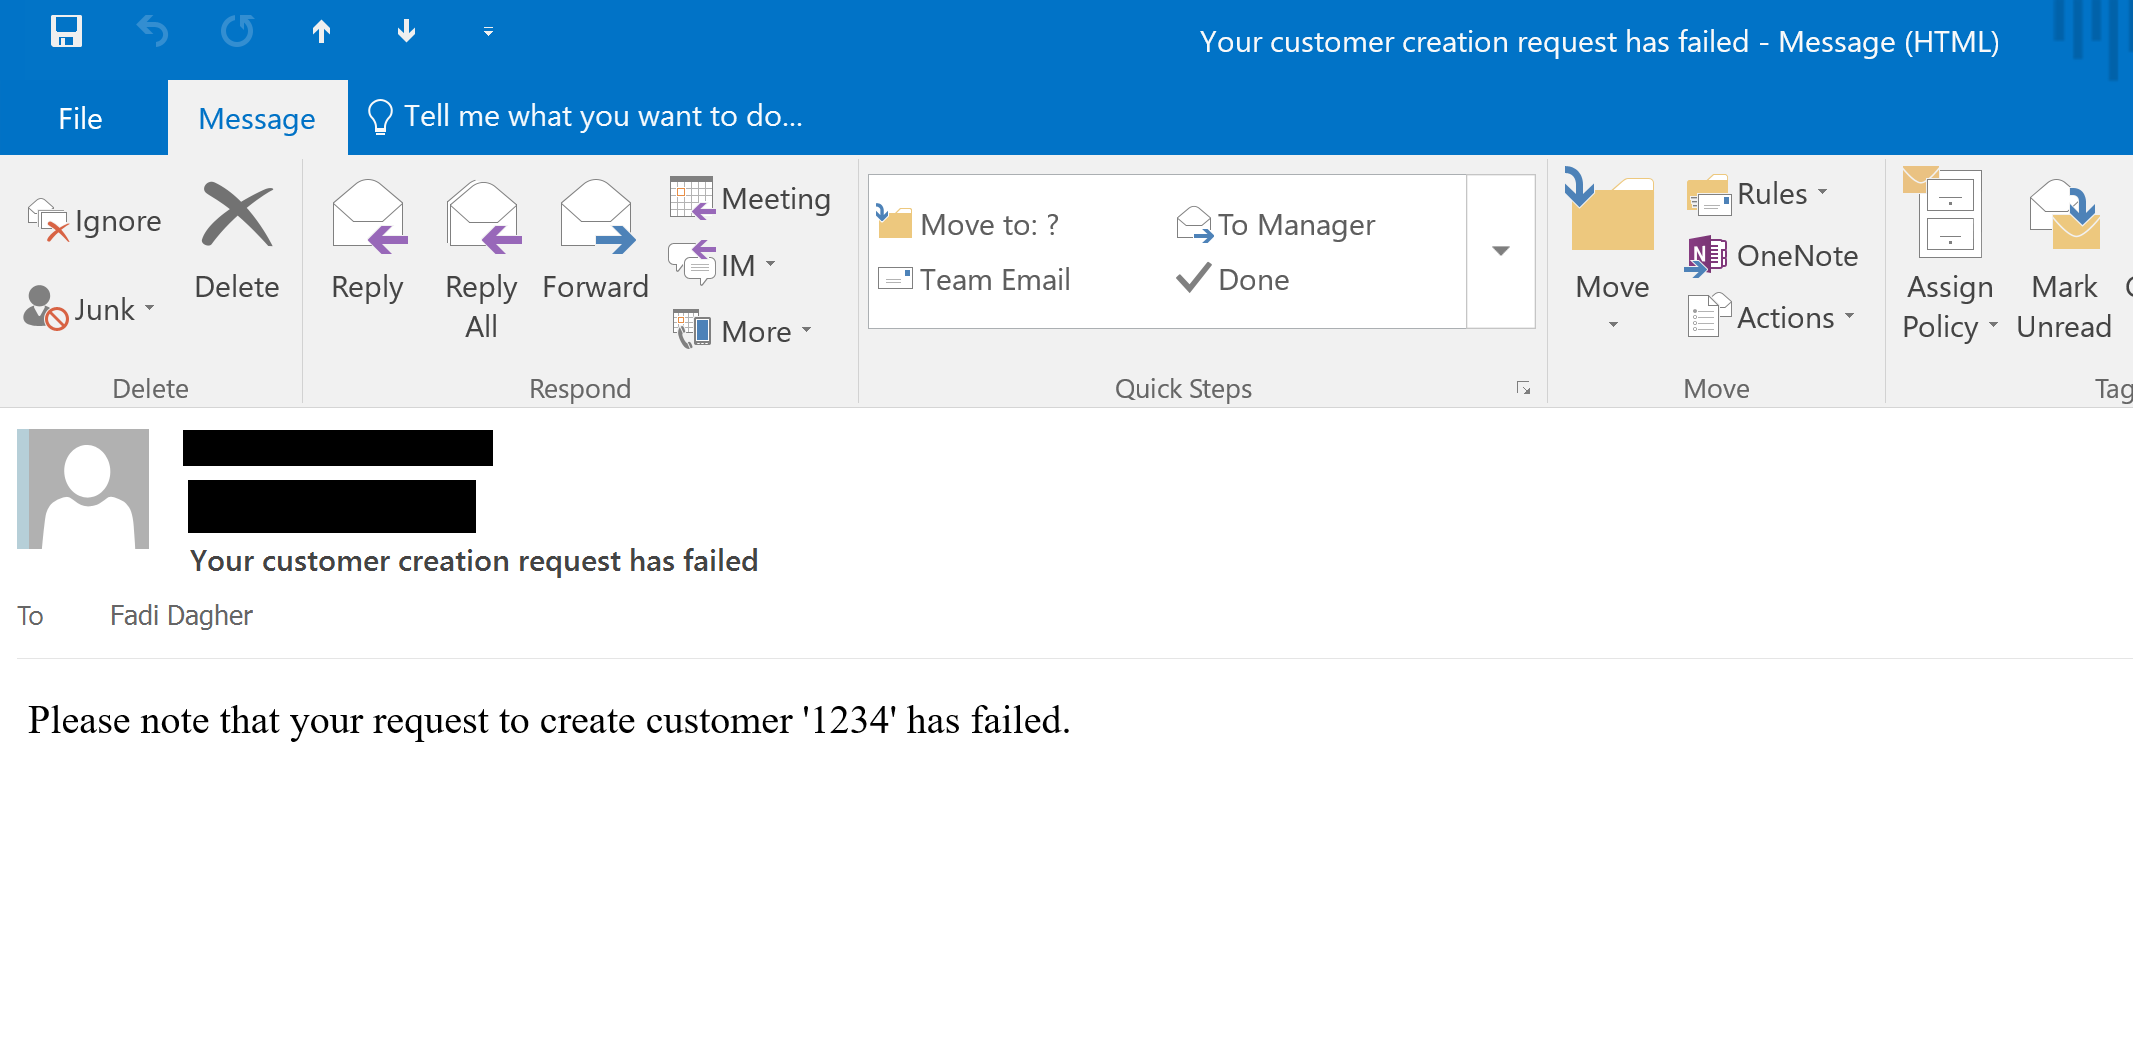
Now let’s test our function. Go back to the function code and click the “Test” link on the right pane. Enter a JSON body that contains body, to, and subject properties, then click “Run”

Check your email and you should find an email in your inbox
This concludes the creation of the Function App and its functions in our scenario. In the next article, we will create the SQL Azure database and the API App hosting our Web API service which will be responsible to save the customer into the database.