In the previous article, we created our business process. What we need to do is to define what services we need to expose to the outside world, what to hide internally, to secure our services, and get insights into the usage and health of our services. API Management helps us to do that. Its acts as a gateway that exposes our services to the outside world. For more information about API Management (APIM), please refer to https://docs.microsoft.com/en-au/azure/api-management/
In our scenario, we need the client to be able to insert a message to the service bus topic. Also, we need to be able to call the client’s callback notification service. That’s pretty much all functionality that needs to be exposed or accessed from the “outside” world. Hence, we need to create two APIs in APIM, one that’s used by the client to add a customer (put a message into the service bus), and one used by our logic app to call the client API.
Before going into the implementation details, let me explain in a very high level the main concepts of APIM:
- Products: A product is a categorization for API’s. One product main contain multiple API’s that can be managed together
- API’s: The API you want to call. You can document it, define it’s inputs, outputs, response messages, etc.
- Policies: Actions that can be done on the requests / responses. There are many out-of-the-box policies such as limiting the number of calls to an API, checking if a header exists, converting Json to Xml and vice versa, etc. Policies can be applied on the API operations level, on the API level, and on the product level.
That should give you a high level information about APIM, sufficient to follow up on what’s needed in this article. Let’s go into implementation.
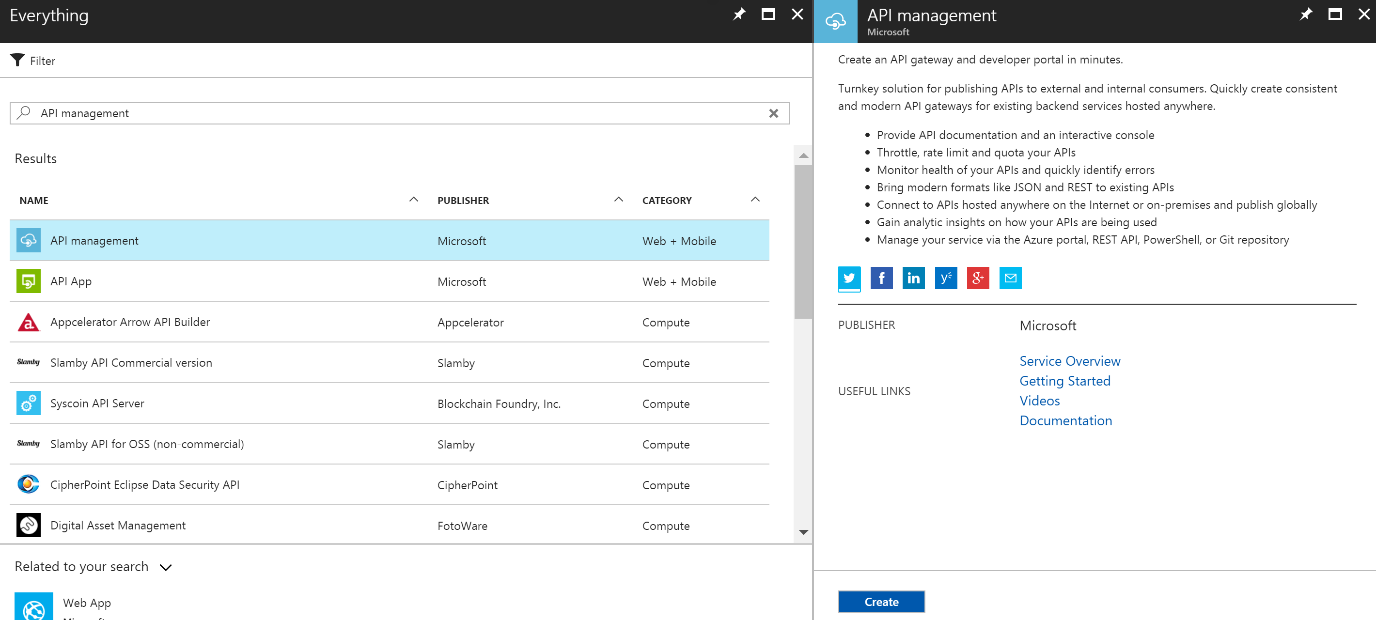
As a first step, we need to create an empty APIM instance. Navigate to our resource group blade and click “+ Add”, search for API Management, select it from the list, then click “Create”.
Fill the APIM instance properties as below and click “Create”
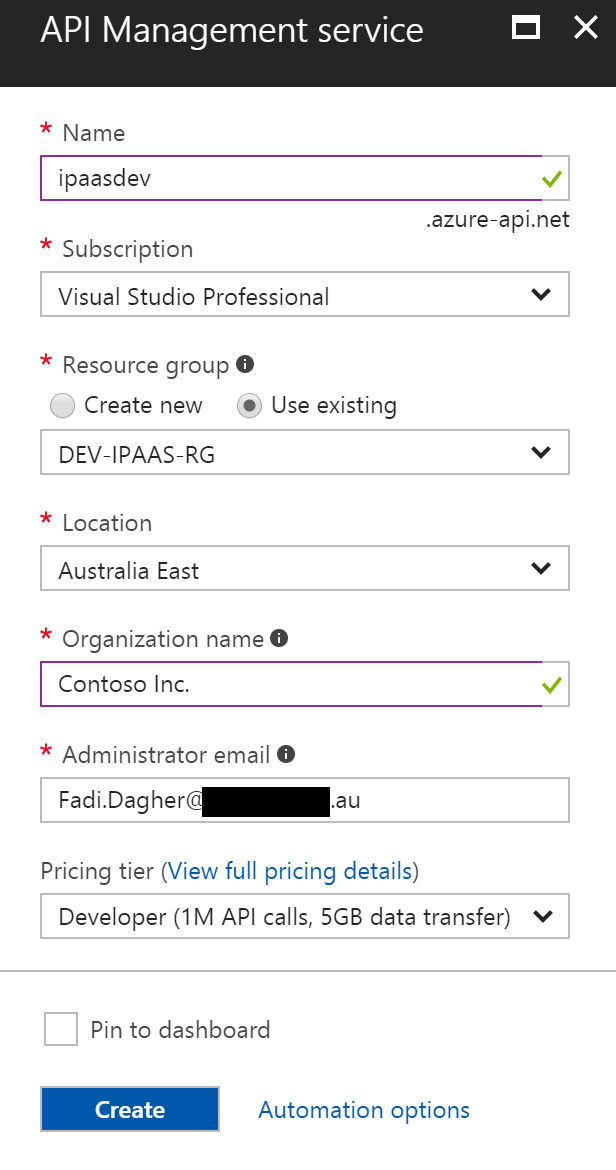
Wait until the new APIM instance is provisioned. Note that this might take around 45 minutes to be completed, so be patient and try to do something else in this time.
Once done, your instance will show among other resources in the resource group blade. Click on the instance to open its blade.

There are two main views here, the administration view, and the developer view. The administration functionality, such as creating products, API’s, policies, registering developers and giving them access to products, all of this is done via the publisher portal. The registered developers can access the developer portal to view the API’s, register in any of the available products, and test the API.
Recently, Microsoft migrated the publisher portal functionalities to the Azure portal directly. Migrated functionalities can be seen on the blade’s left menu under the “API Management” category.
So, what do we want to do? We have a nearly full functional scenario, but in order to add a message to the service bus, we are still accessing the service bus explorer tool to do that. That’s not the way our service client will use to call the customer creation process. For that, we need to create an API in API Management that will add the message to the service bus and return a 202 – Accepted response immediately to the caller. Another API that we would need to create is the API wrapping the third party service we used in our logic app to notify the client that our customer has been created. So in short, we need to create two APIs for our scenario. Let’s go…
Let’s start by adding the API to insert a customer. I’ll call it Entities API, and add a “POST” operation to it that adds an entity, for the scope of this article series, a customer. Click on “APIs” on the left menu, then click “Blank API”. In the popup that appears fill the information as follows:
- Webservice URL: This is the target URL we’re going to redirect the call too. This should be the service bus URL in the following format:
https://{sb_namespace}.servicebus.windows.net/{topic_name}/messages - Name: The display name of the API
API URL suffix: This is the URL of the API visible to the clients

Note that after filling the API URL suffix, the full URL visible to the clients is shown at the bottom in the Base URL field.
Click “Create” to create the API and display the main API designer window

Now we have an empty API with no “Frontend” documentation, “inbound” policies, not “outbound” policies. It just redirects into the “backend” service bus endpoint we have defined.
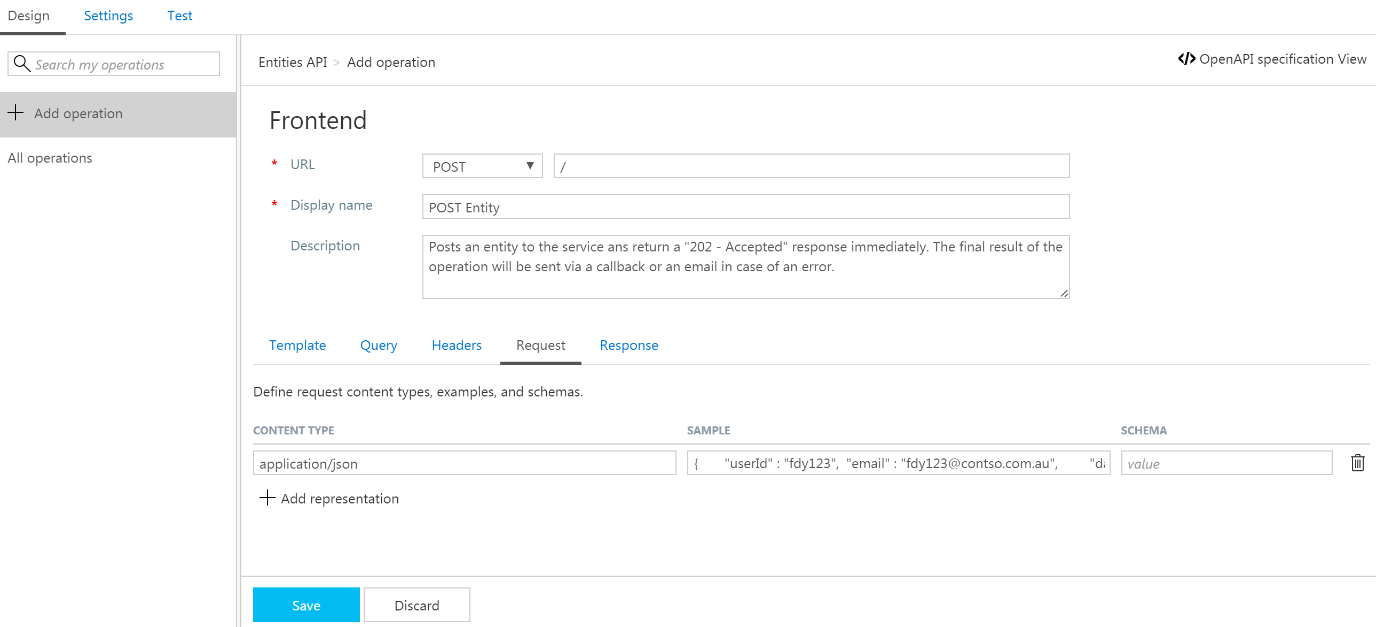
We need to create an operation that posts data into the backend URL. For that, click “+ Add operation” link under the search box. Fill the frontend information as follows:

Go the “Request” tab and click “+ Add representation”, then select “application/json”. Add a sample request to the SAMPLE field, use any of the previous messages we inserted manually into the service bus. Remember, this is documentation only and will be visible in the developer portal to aid the API user (developer) in using the API.
Go to the “Response” tab and click “+ Add response”. Search for 202 Accepted and select it. Enter an informative description about the response. Do the same for 400 – Bad Request

Click “Save” to save your changes and display the full designer of the API

Now it’s time to add some policies. First, we need to check if the “entity” header exists in the request as this will go to the service bus and the subscription will check on this value. Also, if we just forwarded the call to the service bus URL as is, we’ll get a 401 Unauthorized error as the service bus is not anonymously accessible. In order to securely access the service bus, we need to add an “Authorization” header to the request and give it the service bus “SAS” token.
We saw in article 3 how to get the service bus “primary key” from the “Shared access policies” tab. We can generate a SAS token from the primary key using the code provided in the following URL:
You can create a simple tool to generate the SAS token using the code provided in the above link. The link also shows how the SAS token is used in the Http call, which is exactly what we are doing here.
Now that we have the SAS token, click on the edit pencil link on the top of the “Inbound processing” box to add a policy. You will find some policies that you can define visually such as set header, set body, and return a mock response policies. But I prefer to go to the code view to see the full set of policies I can chose from. Click on “Code view” on the top right corner of the window, put the cursor after the <inbound> element and press <Enter>. Click on “Check HTTP header” policy to add it to our list of policies. Fill the policy attributes as below:

This policy will make sure the “entity” header is there in the request and the value is “Customer”. In the future, we can add multiple allowed values by replicating the “<value>” node for each allowed value. This header will go into the service bus as a property, then the subscription can be evaluated.
Now, let’s add the “Authorization” header. For that, click on the “Set HTTP header” policy and set the name to “Authorization” and the “exists-action” to “override”, then in the “value” element, paste the SAS token you have generated previously wrapped in a CDATA element. The “Inbound” policies should look like:
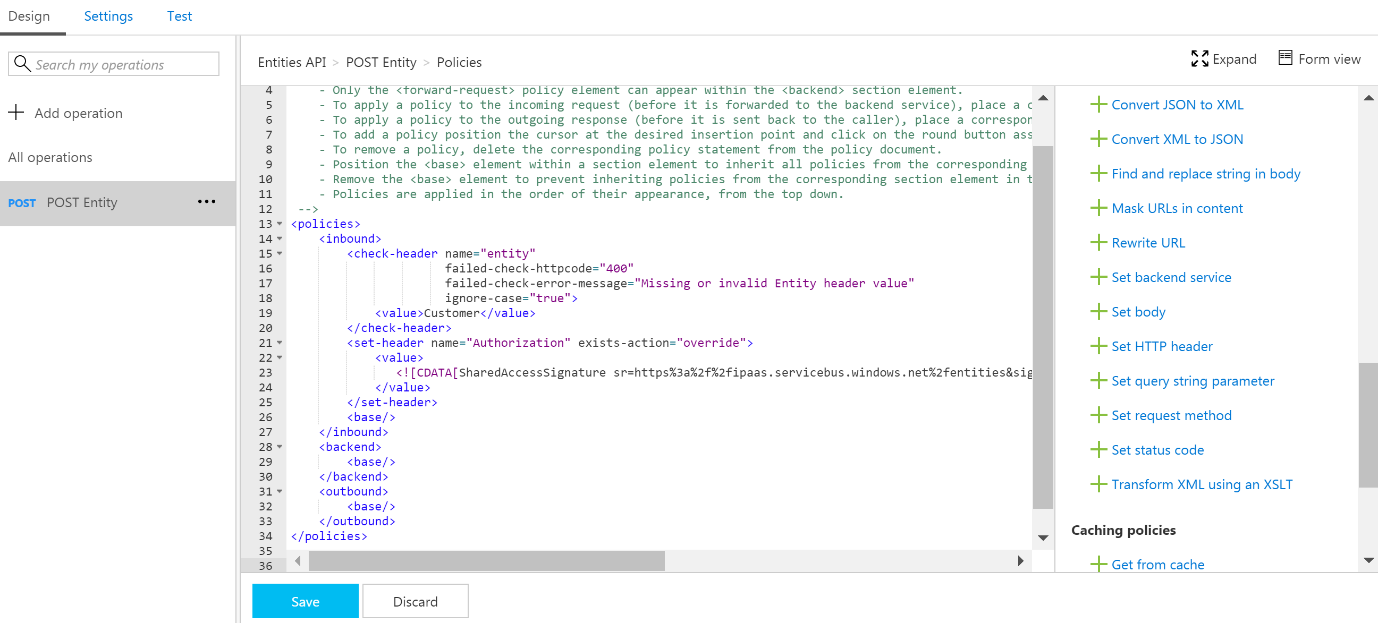
Click “Save” to save the policies and get back to the main API screen

That should be it for the first API, let’s create the second API which should wrap the client’s service we called from the Logic App. That should be straight forward with no policies needed. A usual case which you might face here is if the client’s service is a SOAP over XML one. In that case we could use the JSON to XML policy to transform our call from JSON to a SOAP message, but that’s not the case now.
Click “+ Add API”, then Blank API and fill the information as below, then click “Create”

Click “+ Add operation” and fill the attributes as we did in the previous API, then click “Save”

One more thing before being able to test our API’s. We need to create products and add the API’s to those products. I’ll create two products, one for external services, and one our internal Azure hosted services. This means the Entities API will go into the internal product, to be called “Data Management”, and the Client’s Customer Notification API will go into the external product, to be called “Vendors”.
To do that, let’s click on “Products” on the left menu of the APIM blade. Note that there are two already created products for us. We’ll not use them in this demo. Click “+ Add” then fill the properties as per your preference, click “Select API”, select the “Entities API”, click “Select”, then “Create”

Do the same steps to create the “Vendors” product and add the client’s API to it.
After doing that, let’s go and test our API’s. Click back on the “API’s”, “Entities API”, “POST Entity”, then on the “Test” tab. You’ll see the API test page filled with the documentation information you previously filled. Notice the presence of the “Ocp-Apim-Subscription-Key” header in the Headers section. This is the “Data Management” product key generated for us. Anyone who wants to call our API needs to add this key to the headers collection or else the call will be unauthorized.

Go on and click “Send” without doing any changes. You should get a “Bad Request“ response with the below body:
{ “statusCode”: 400, “message”: “Missing or invalid Entity header value” }
This is because we haven’t suppled the “entity” header as required in the policy we set. To fix that, click “+ Add header”, specify “entity” and the name, and “Customer” as the value, then click “Send” again. You should get a 201 Created response now.
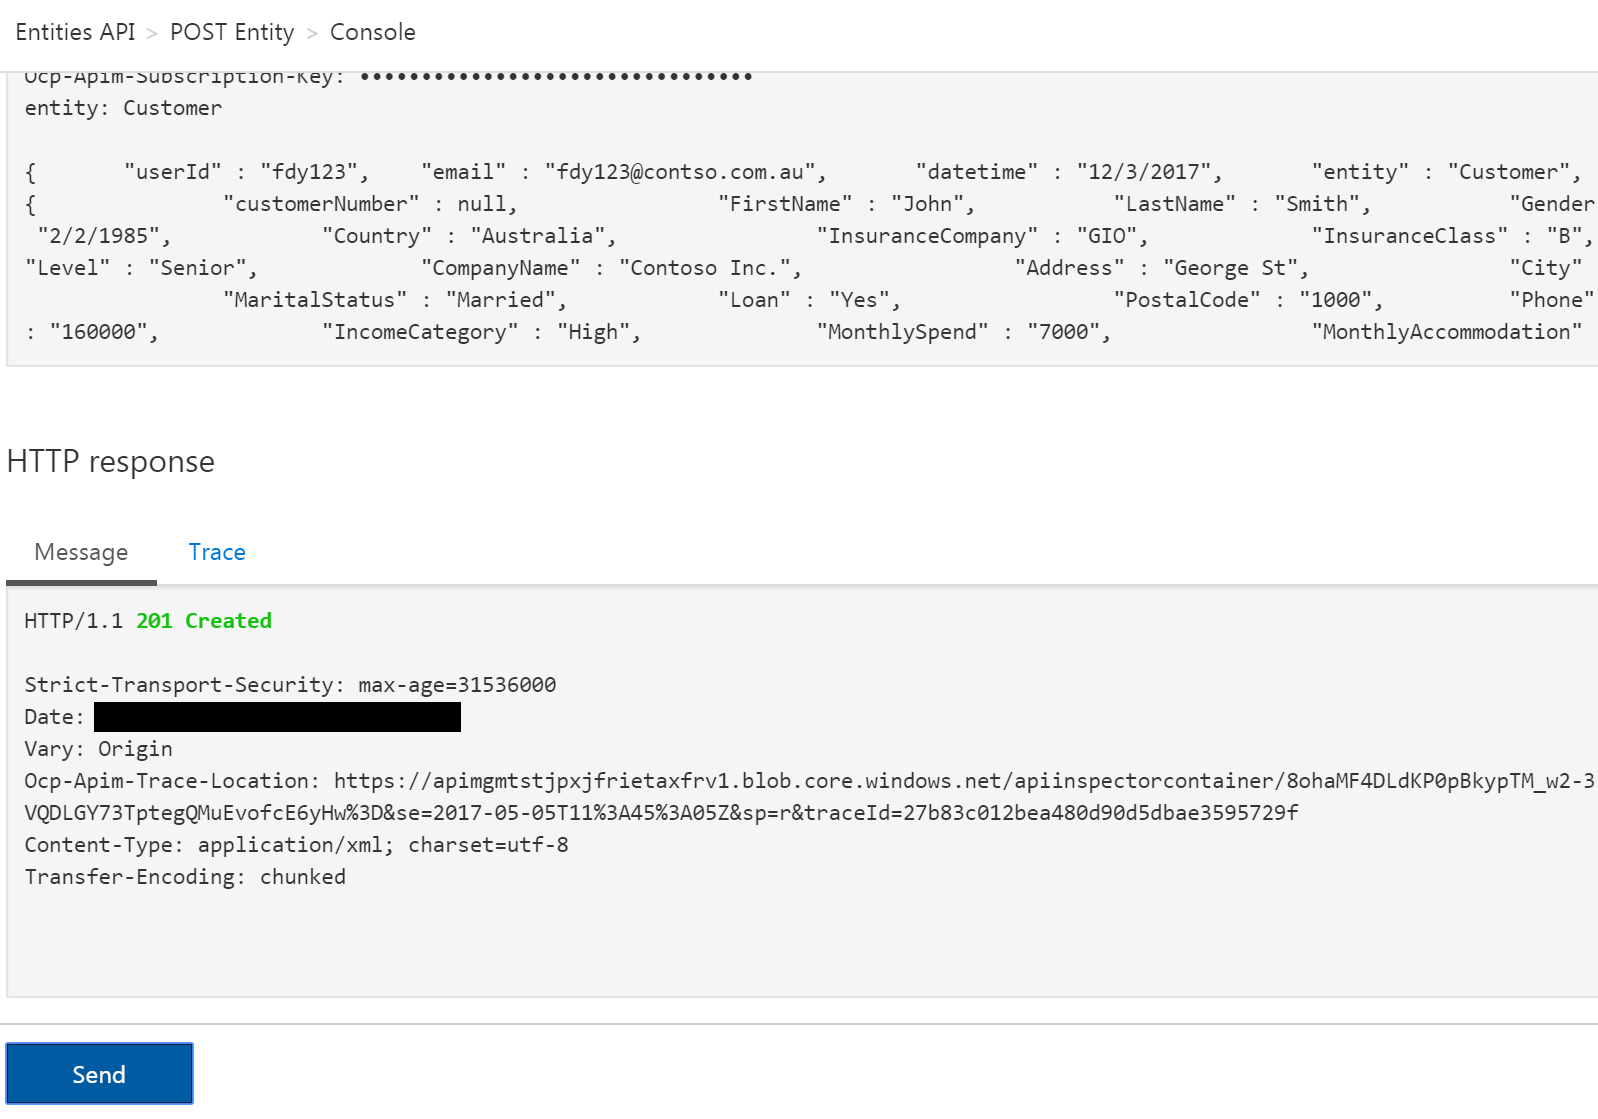
Go to the “CreateCustomer” logic app and validate it picked up the message from the service bus and processed it successfully

Click on the result to validate which steps ran inside the logic app

Notice the “Uri” value? We are still calling the client service directly. We need to change that to call it via the APIM API we previously created.
First, we need to get the “Vendors” subscription key as we need to provide it now in our call. We can get it from the “Developers” portal which we haven’t seen until now. Let’s go to the main blade of the APIM instance, and click on “Developer portal” on the top menu. The portal will open in a new window. From the developer portal the developer (subscriber) can view the products and API’s, request subscription to any product, then after getting subscribed, can call any API belonging to that product using the subscription key generated.
In the developer portal, click on arrow icon next to the “ADMISTRATOR” user, which is the current user I’m logging in with, then click “PROFILE”
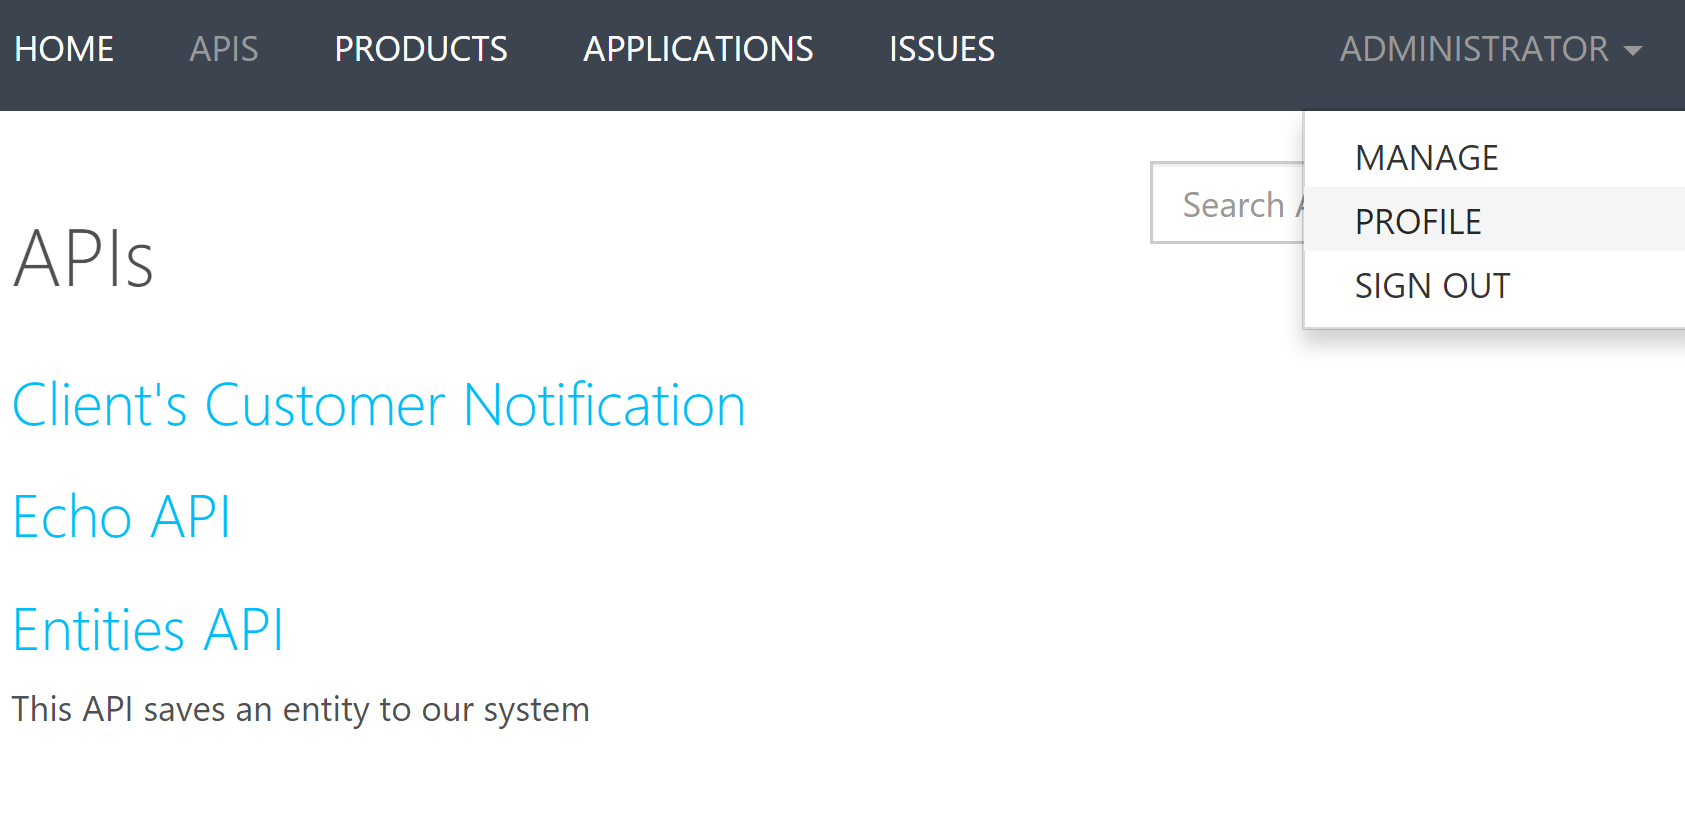
Under the “subscriptions” section, locate the “Vendors” subscription, click the “Show” link next to the masked key to show the subscription key. Copy the value shown, we’ll need it in the next step.

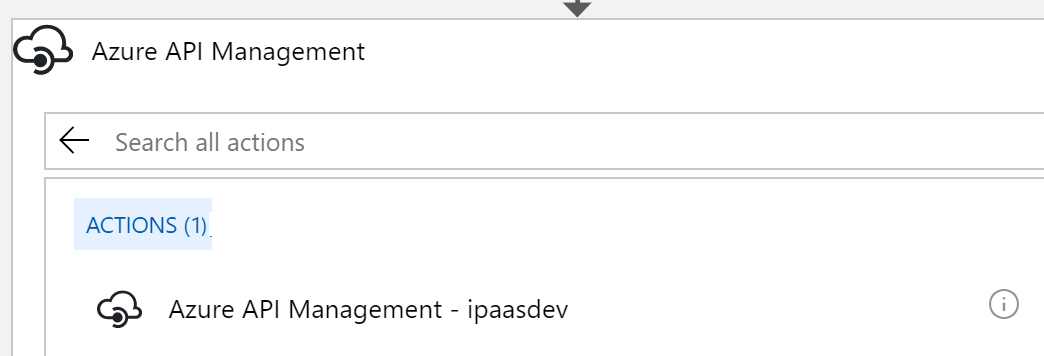
Open the “CreateCustomer” Logic App designer and navigate to the “Call Third Party Service to Notify”. Hover over the arrow beneath it and click the “+” circle that appears to add a step in that location. Search API management, then select the APIM instance we created
Select the customer notification API from the list of available API’s
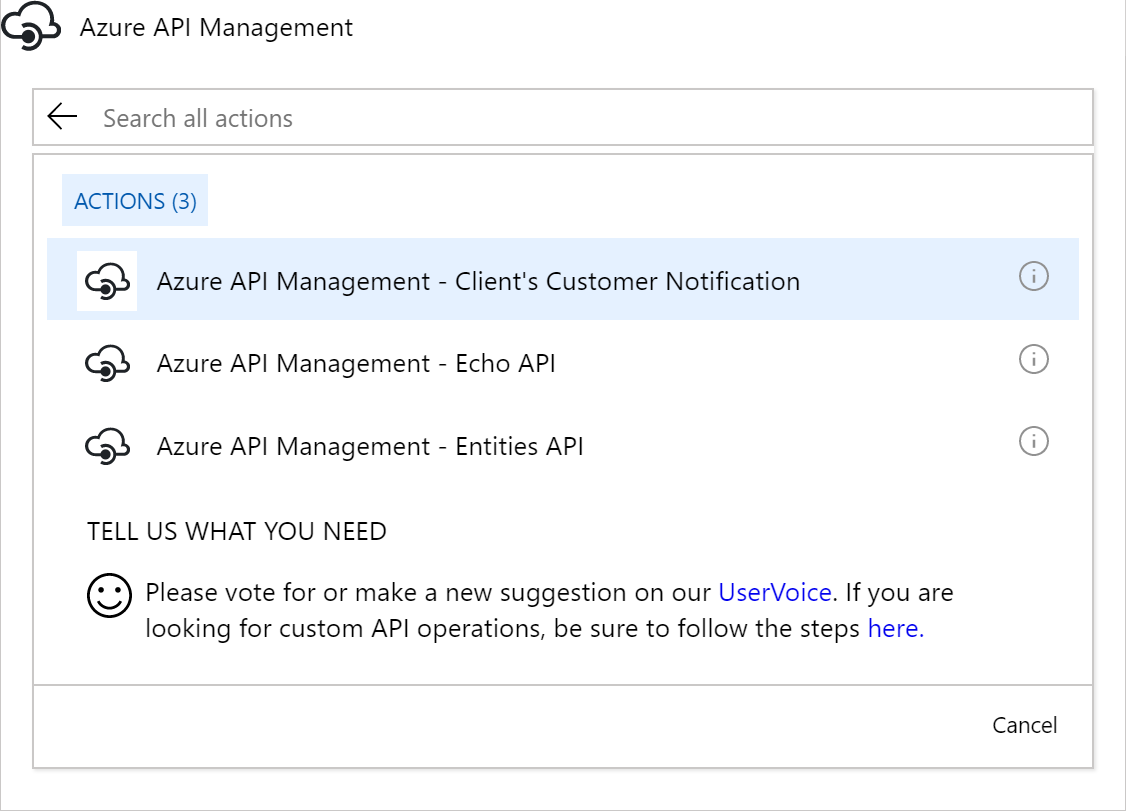
Chose the only operation available, which is the post operation, then paste the vendor’s product subscription key we copied in the previous step. Save and test again, now our outbound call should go throw our APIM API. Note that you can test from the “Test” tab in the “APIs” section as we did before, from the developer portal we’ve just opened, or you can use any http client, such as Postman, to call the API.
That should conclude our API management article in this series. Next, we’ll have a look at how to secure our solution.