In this article, or better to say, in this guide, we are going to explain in deep dive how to create a Boomi custom connector. Boomi comes with hundreds of built-in connectors, however, in many situations, you might find yourself in a position where there’s no out-of-the-box connector available. If the target system exposes an API layer, you can use the HTTP Connector to connect to it, however, using a packaged connector is always neater and encapsulates the functionality in a more professional and reusable fashion.
There’s a lot of resources available which explains how to create a custom connector, however, we found no single resource which gives a comprehensive tutorial on how to do that from A to Z, so we decided to tackle this problem in this article.
It’s worth noting that Boomi has created an article series on how to build a custom connector, however, we’ll go beyond that in this article, as well as go into more details into some steps which were not covered in enough details in this series. However, we always advise to go through that article series first to get a high-level idea about the process and understand the different components within the connector SDK and what they are used for.
Enough with the introductions, let’s get going into this.
Step 1: Setting up the IDE
This step is only required once, when you want to develop your custom connector for the first time. For any subsequent connectors, this is not required. Here, we will use Apache Maven to build our connector. You can use Gradle as well, however, we opted to use Maven as this is the more common way.
The following steps builds on the Building a connector with Apache Maven article with the aforementioned Boomi series, but goes into more details on how to achieve the steps mentioned in that article.
Setup the Environment Variables
First, we’ll need to set up some environment variables. To do that, follow the below steps. Note that these steps were performed on a Mac OS, so there might be slight differences if you are attempting them on a Linux OS:
- Enter the following command to locate the path of your JDK installation:
/usr/libexec/java_home -v 11
- Enter the following command to locate where maven is installed
which mvn
- Open the bash profile file (create if not existing)
open ~/.bash_profile
- Add the following. Replace values by your actual locations to Java and Maven
export JAVA_HOME=/Library/Java/JavaVirtualMachines/temurin-17.jdk/Contents/Home
export M2_HOME=/opt/homebrew/Cellar/maven/3.9.0/libexec
export PATH=”$M2_HOME/bin:$PATH”
- Apply changes to current terminal session
source ~/.bash_profile
Update Maven’s Settings File
Next, we need to update Maven’s settings file, as follows:
- Open settings file from ~/.m2/settings.xml
- Add the following to the file
<settings>
<profiles>
    <profile>
      <id>boomi-repository</id>
      <repositories>
        <repository>
          <id>boomi-maven-repository</id>
          <url>https://boomisdk.s3.amazonaws.com/releases</url>
          <releases>
            <enabled>true</enabled>
          </releases>
          <snapshots>
            <enabled>false</enabled>
          </snapshots>
        </repository>
      </repositories>
    </profile>
  </profiles>
  <activeProfiles>
    <activeProfile>boomi-repository</activeProfile>
  </activeProfiles>
</settings>- Save and close the file
Step 2: Create the Connector Project
Now we get into creating our custom connector. To do that, Boomi uses a Maven command which creates the basic structure of the connector. Go on and follow the below steps to create the basic project. Replace the text between the <> with your specific connector’s name / company information
- Open terminal and navigate to the folder where you want your connector to reside in. Don’t create any folder as it will be created automatically.
- Run the following command:
mvn archetype:generate -DarchetypeGroupId=com.boomi.connsdk -DarchetypeArtifactId=connector-sdk-archetype -DarchetypeVersion=RELEASE -DsdkVersion=RELEASE - Follow the instructions by defining the following properties in the below format
‘groupId’: com.<your_company_name>.connector.<your_connector_name>
‘artifactId’: boomi-connector-<your_connector_name>
‘version’ 1.0-SNAPSHOT: : 1.0
‘package’ com.<your_company_name>.connector.<your_connector_name>: <Empty>
The project will be created automatically after that
- Open the project in your preferred IDE. We’ll use Visual Studio Code

- Open the pom.xml file. If the version of the com.boomi.util dependency is 2.3.0, change the version to 2.3.8 as the project will not build with that version.
- Open the src/main/assembly/assembly.xml and change the id value from “-car” to any abbreviation you want your generated package to be suffixed with. This is not an important step, however, I don’t like the default “-car” suffix, can’t see it relevant.
- Run the following command to build the project
mvn clean install
This downloads the dependencies and builds the initial JAR.

Congratulations! You’ve got a basic custom connector that compiles successfully but doesn’t do anything! Let’s get into more details
Step 3: Implement the Basic Structure
In this step, we’ll create the basic foundational classes you need in any connector. We’ll keep them empty for now, we’ll perform a basic implementation later in the article.
- First, define a skeleton connection class as follows:
package com.boomi.connector.<connector_name>connector;
import com.boomi.connector.api.BrowseContext;
import com.boomi.connector.util.BaseConnection;

public class <connector_name>Connection extends BaseConnection {
public <connector_name>Connection(BrowseContext context) {
super(context);
}
}
PS: You can define reusable methods here as the connection will be referenced in all operations. We’ll do that later when we implement the classes with an actual scenario.
- Second, define the skeleton browser class as follows. The browser is needed if you need the browse / generate profiles capability while building your operations.
package com.boomi.connector.<connector_name>connector;
import com.boomi.connector.api.BrowseContext;
import com.boomi.connector.api.ConnectorException;
import com.boomi.connector.api.ContentType;
import com.boomi.connector.api.ObjectDefinition;
import com.boomi.connector.api.ObjectDefinitionRole;
import com.boomi.connector.api.ObjectDefinitions;
import com.boomi.connector.api.ObjectType;
import com.boomi.connector.api.ObjectTypes;
import com.boomi.connector.util.BaseBrowser;
import com.boomi.util.ClassUtil;
import com.boomi.util.IOUtil;
import com.boomi.util.StreamUtil;
import java.io.IOException;
import java.io.InputStream;
import java.nio.charset.Charset;
import java.util.Collection;

public class <connector_name>Browser extends BaseBrowser {
   protected <connctor_name>Browser(BrowseContext context) {
       super(context);
   }

   @Override
   public ObjectDefinitions getObjectDefinitions(String objectTypeId
, Collection<ObjectDefinitionRole> roles) {
       // TODO Auto-generated method stub
       throw new UnsupportedOperationException("Unimplemented method 'getObjectDefinitions'");
   }

   @Override
   public ObjectTypes getObjectTypes() {
       // TODO Auto-generated method stub
       throw new UnsupportedOperationException("Unimplemented method 'getObjectTypes'");
   }
}- If you want to expose a get operation, define the Get Operation class which exposes a reference to the connection class built previously, and implements the executeGet operation. This operation gets invoked when you run your integration and the document reaches the Get operation you created in your process. Keep it unimplemented for now, we’ll do that later. This will be used to implement the “get” functionality with a parameter within our connector.
package com.boomi.connector.<connector_name>connector;
import com.boomi.connector.api.GetRequest;
import com.boomi.connector.api.OperationResponse;
import com.boomi.connector.util.BaseGetOperation;

public class GetOperation extends BaseGetOperation {
   protected GetOperation(<connector_name>Connection connection) {
       super(connection);
   }

   @Override
   public <connector_name>Connection getConnection() {
       return (<connector_name>Connection) super.getConnection();
   }

   @Override
   protected void executeGet(GetRequest request, OperationResponse operationResponse) {
       throw new UnsupportedOperationException("Unimplemented method 'executeGet'");
   }
}- If you want to expose an execute operation, define the Execute Operation class. Similar to the Get operation, let’s keep this unimplemented for now, we’ll do that later. This will be used to implement the “get” functionality without a parameter within our connector
package com.boomi.connector.<connector_name>connector;
import com.boomi.connector.api.OperationResponse;
import com.boomi.connector.api.UpdateRequest;
import com.boomi.connector.util.BaseUpdateOperation;

public class ExecuteOperation extends BaseUpdateOperation {
   protected ExecuteOperation(<connector_name>Connection connection) {
       super(connection);
   }

   @Override
   public <connector_name>Connection getConnection() {
       return (<connector_name>Connection) super.getConnection();
   }

   @Override
   protected void executeUpdate(UpdateRequest request, OperationResponse response)
  {
      throw new UnsupportedOperationException("Unimplemented method 'executeUpdate'");
   }
}- If you want to expose a create operation, define the create operation class in similar fashion to the previous definitions. This will be used to implement the “inserts” functionality within our connector
package com.boomi.connector.<connector_name>connector;
import java.io.InputStream;
import java.util.logging.Level;
import java.util.logging.Logger;
import com.boomi.connector.api.ObjectData;
import com.boomi.connector.api.OperationResponse;
import com.boomi.connector.api.OperationStatus;
import com.boomi.connector.api.PayloadMetadata;
import com.boomi.connector.api.PayloadUtil;
import com.boomi.connector.api.ResponseUtil;
import com.boomi.connector.api.UpdateRequest;
import com.boomi.connector.util.BaseUpdateOperation;
import com.boomi.util.IOUtil;

public class CreateOperation extends BaseUpdateOperation{
   public CreateOperation(<connector_name>Connection connection) {
       super(connection);
   }

   @Override
   public <connector_name>Connection getConnection() {
       return (DemoConnection) super.getConnection();
   }

   @Override
   protected void executeUpdate(UpdateRequest updateRequest, OperationResponse operationResponse) {
       throw new UnsupportedOperationException("Unimplemented method 'executeUpdate'");
   }
}- Now that the browser, connection, and operations are defined, we can define the connector class. This hooks everything together and basically invokes your defined classes for the operations triggered.
package com.boomi.connector.<connector_name>connector;
import com.boomi.connector.api.BrowseContext;
import com.boomi.connector.api.Browser;
import com.boomi.connector.api.Operation;
import com.boomi.connector.api.OperationContext;
import com.boomi.connector.util.BaseConnector;

public class <connector_name>Connector extends BaseConnector {
   public Browser createBrowser(BrowseContext context) {
       return new <connector_name>Browser(context);
   }

   @Override
   public Operation createGetOperation(OperationContext context) {
       return new GetOperation(new <connector_name>Connection(context));
   }

   @Override
   public Operation createCreateOperation(OperationContext context)
   {
       return new CreateOperation(new DemoConnection(context));
   }

   @Override
   protected Operation createExecuteOperation(OperationContext context) {
       return new ExecuteOperation(new <connector_name>Connection(context));
   }
}- Before we continue developing our connector, we need to enter the fully qualified name of the connector class in the connector-config.xml file and change the sdkApiVersion. If you don’t change the version, the connector will not work. Open this file and do that:
<?xml version="1.0" encoding="UTF-8"?>
<GenericConnector sdkApiVersion="2.8.1">
<connectorClassName>com.<company_name>.connector.<connector_name>connector.<connector_name>Connector</connectorClassName>
</GenericConnector>- As of now, we have a skeleton project with all base files needed. In the next sections, we’ll go into details of how to implement the code showcasing many common coding snippets.
Step 4: Implement Our Scenario
Our demo connector will use the GET, EXECUTE, and CREATE operations to get an order, all orders by status, and insert an order into a mock API. We’ll also implement the Browse class to provide design-time browsing capability in order to automatically create the relevant profiles. The following sections implements our connector’s functionality in full.
Implement the Connector Descriptor
Open the connector-desriptor.xml file. This file contains the definition of the connector from a user-interface perspective. You define the connector properties, the operations, the fields in those operations, any incoming document properties, and any outgoing document properties as well. Whatever you define here, you can access in the classes you previously created. Here’s the implementation for our connector. The implementation is thoroughly commented to explain all included sections.
<?xml version="1.0" encoding="UTF-8"?>
<GenericConnectorDescriptor>
   <!-- Define the connector properties -->
  <field id="host" label="Host" type="string">
      <helpText>The host of the target service</helpText>
      <defaultValue>your_api_host</defaultValue>
  </field>

  <field id="username" label="Username" type="password"/>
  <field id="password" label="Password" type="password"/>

  <!-- Define the Get operation, this required an input Id parameter to get a single resource -->
  <operation types="GET" customTypeId="GET"/>
  <!-- Define the CREATE operation -->
  <operation types="CREATE" customTypeId="INSERT"/>
  <!-- Define the Execute operation and use it to get data (without a need for Id parameter)-->

  <!-- Define properties for the operation -->
  <operation types="EXECUTE" customTypeId="GET_ALL" customTypeLabel="QUERY">
      <field type="string" id="query" label="Query Parameter">
          <helpText>The query parameter value, such as retrieve success or failures.</helpText>
          <defaultValue>successes</defaultValue>
          <allowedValue label="Successes">
              <value>successes</value>
          </allowedValue>
          <allowedValue label="Failures">
              <value>failures</value>
          </allowedValue>
      </field>
  </operation>

  <!-- Define an incoming document property to send a source value to the destination -->
  <dynamicProperty type="string" id="source" label="Source" />
  <!-- Define an outgoing document property to return the operation status code -->
  <trackedProperty id="status_code" label="Status Code" />
 </GenericConnectorDescriptor>
Create the Schema Files
In order for the Browser class to be able to successfully create the profiles at design-time, we need to define the schemas of the profiles to be created.
We need two profiles to be created, one for getting or inserting a single order, here’s how it looks like:
{
     "order_number": "ORD001",
     "customer_id": "CUST001",
     "customer_name": "Alice Smith",
     "order_date": "2024-03-01T09:30:00Z",
     "total_amount": 149.99,
     "status": "Processing",
     "payment_method": "Credit Card",
     "shipping_method": "Standard"
}
The other is to retrieve multiple orders, here’s how it will look like
{
 "orders": [
   {
     "order_number": "ORD001",
     "customer_id": "CUST001",
     "customer_name": "Alice Smith",
     "order_date": "2024-03-01T09:30:00Z",
     "total_amount": 149.99,
     "status": "Processing",
     "payment_method": "Credit Card",
     "shipping_method": "Standard"
   },
   {
     "order_number": "ORD002",
     "customer_id": "CUST002",
     "customer_name": "Bob Johnson",
     "order_date": "2024-03-02T14:15:00Z",
     "total_amount": 279.95,
     "status": "Shipped",
     "payment_method": "PayPal",
     "shipping_method": "Express"
   }
}
We need to generate schemas for both. To do that, we can use any online tool such as transform.tools to do that
Once the schemas are generated, we can save them as json files under the resources folder of our project’s structure.

Implement the Browse Functionality
In order to implement the Browse functionality for auto-creation of profiles, we need to implement the two overridden methods created previously. The two methods are:
- getObjectDefinitions: This method is invoked in the first step of the Import Operation to display the list of object types and allow you to select one. So your implementation here is to populate this list of “supported” object types. Here’s a sample of the Amazon S3 connector object types when importing an operation.

- getObjectTypes: This method is invoked when attempting to generate the profiles, so your implementation here should point out to the correct schemas so that the right profiles would be generated. This method takes as input the objectTypeId, which could be either GET, EXECUTE, or CREATE (as defined in the descriptor file), and the list of roles, which would be INPUT and OUTPUT. These parameters allow you to know the context of the call in order to point out to the right schema.
Go on and replace the getObjectDefinitions implementation with the following one. This implementation adds two types to the list, one is Order and the other is Orders
@Override
   public ObjectTypes getObjectTypes() {
       ObjectTypes types = new ObjectTypes();
       ObjectType ordertype = new ObjectType();
       ordertype.setId(ORDER);
       ordertype.setLabel(ORDER);
       types.getTypes().add(ordertype);

       ObjectType orderstype = new ObjectType();
       orderstype.setId(ORDERS);
       orderstype.setLabel(ORDERS);
       types.getTypes().add(orderstype);
       return types;
   }
Then replace the getObjectDefinitions implementation by the below one
@Override
   public ObjectDefinitions getObjectDefinitions(String objectTypeId, Collection<ObjectDefinitionRole> roles) {
       String jsonSchema = null;
       ObjectDefinitions definitions = new ObjectDefinitions();
       ObjectDefinition objdef = new ObjectDefinition();
// Get the custom operation schema as per the descriptor operation definition (ex. GET_ALL, INSERT, GET)
       String customOpsType = getContext().getCustomOperationType();
// Get the operation schema as per the descriptor operation definition (ex. GET, EXECUTE, CREATE) -- NOT USED
       OperationType opsType = getContext().getOperationType();
       switch (customOpsType) {
           case "INSERT":
               jsonSchema = getJsonOrderSchema();
               break;
           case "GET_ALL":
           jsonSchema = getJsonOrdersSchema();
               break;
           case "GET":
               jsonSchema = getJsonOrderSchema();
               break;
           default:
               break;
       }

       if (jsonSchema == null) {
           definitions = this.getUnstructuredSchema(objdef, definitions);
       } else {
           definitions = this.getJsonStructure(jsonSchema, objdef, definitions);
       }
       //return definitions;
       return definitions;
   }
This implementation captures the custom operation type as defined in the descriptor file, and based on the values reads the appropriate json schema and add it to the collection of object definitions. You could use the operation schema value as well, both works, and we’ve retrieved that as well in case you want to change the implementation.
Also, add the below implementations for the private methods used in the getObjectDefinitions new implementation
private static String getJsonOrdersSchema() {
       String schema;
       InputStream is = ClassUtil.getResourceAsStream(ORDERS_SCHEMA);
       try {
           schema = StreamUtil.toString(is, Charset.forName(UTF8));
       } catch (IOException ex) {
           throw new ConnectorException("Error reading schema", ex);
       } finally {
           IOUtil.closeQuietly(is);
       }
       return schema;
   }

   private static String getJsonOrderSchema() {
       String schema;
       InputStream is = ClassUtil.getResourceAsStream(ORDER_SCHEMA);
       try {
           schema = StreamUtil.toString(is, Charset.forName(UTF8));
       } catch (IOException ex) {
           throw new ConnectorException("Error reading schema", ex);
       } finally {
           IOUtil.closeQuietly(is);
       }
       return schema;
   }

   private ObjectDefinitions getUnstructuredSchema(ObjectDefinition objdef, ObjectDefinitions objdefs) {
       objdef.setElementName("");
       objdef.setOutputType(ContentType.BINARY);
       objdef.setInputType(ContentType.NONE);
       objdefs.getDefinitions().add(objdef);
       return objdefs;
   }

   private ObjectDefinitions getJsonStructure(String jsonSchema, ObjectDefinition objdef, ObjectDefinitions objdefs) {
       objdef.setElementName("");
       objdef.setJsonSchema(jsonSchema);
       objdef.setOutputType(ContentType.JSON);
       objdef.setInputType(ContentType.JSON);
       objdefs.getDefinitions().add(objdef);
       return objdefs;
   }
To close the Browser implementation off, build the project again using the mvn clean install command to verify your changes haven’t caused any compilation issues.
Create Helper Classes for HTTP Client Functionality
Since in this scenario we’ll be performing some HTTP Gets and Posts to external APIs, we need to create a couple of helper classes. If your scenario doesn’t include such a requirement, you can skip this section.
- Create a folder called “client” under the democonnector folder
- Create a file called “RepeatableInputStreamEntity.java” and populate it with the below code. Neglect the compilation errors for now.
package com.boomi.connector.<connector_name>connector.client;
import org.apache.http.entity.InputStreamEntity;
import java.io.IOException;
import java.io.InputStream;
import java.io.OutputStream;

public class RepeatableInputStreamEntity extends InputStreamEntity {
   public RepeatableInputStreamEntity(InputStream input, long length) {
       super(input, length);
       if (!input.markSupported()) {
           throw new IllegalArgumentException("input does not support mark/reset");
       }
   }

   @Override
   public boolean isRepeatable() {
       return true;
   }

   @Override
   public InputStream getContent() throws IOException {
       InputStream content = super.getContent();
       content.reset();
       return content;
   }

   @Override
   public void writeTo(OutputStream outstream) throws IOException {
       super.getContent().reset();
       super.writeTo(outstream);
   }
}- Create a file called “RESTClient.java” and populate it with the below code. Neglect the compilation errors for now.
package com.boomi.connector.<connector_name>connector.client;

import org.apache.http.client.methods.CloseableHttpResponse;
import org.apache.http.client.methods.HttpUriRequest;
import org.apache.http.client.protocol.HttpClientContext;
import org.apache.http.impl.client.CloseableHttpClient;
import java.io.Closeable;
import java.io.IOException;

public class RESTClient implements Closeable {
   private final CloseableHttpClient _client;
   private final HttpClientContext _context;

   public RESTClient(CloseableHttpClient client, HttpClientContext context){
       _client = client;
       _context = context;
   }

   public void close() throws IOException {
       _client.close();
   }

   public CloseableHttpResponse executeRequest(HttpUriRequest request) throws Exception{
       return _client.execute(request,_context);
   }
}- Open the pom.xml file located in the project root
- Add the following dependency section under the <dependencies> element
<dependency>
           <groupId>org.apache.httpcomponents</groupId>
           <artifactId>httpclient</artifactId>
           <version>4.5.14</version>
</dependency>- Rebuild the project to verify no compilation errors are introduced
mvn clean install
Implement the Connection Class
Let’s move to the next step and implement the Connection class. This class will be referenced from within all operation classes, so it’s a good place to put any code that needs to be reused across different operations. Let’s start by defining three static strings that correspond to the host, username, and password fields defined in the descriptor file.
private static final String USERNAME_FIELD = "username";
private static final String PASSWORD_FIELD = "password";
private static final String BASE_HOST_FIELD = "host";
We’ll read those values set by the user in the connection properties into these three fields. To do that, we can use the below command:
getContext().getConnectionProperties().getProperty(BASE_HOST_FIELD);Ok, add the below method to set the base URL of the API we will be invoking
/**
    * Fetch the base url field, this is defined in the descriptor. the id should always match to fetch the correct field.
    * @return the baseURL defined by the user
    */
   public String getHost() {
       String host = getContext().getConnectionProperties().getProperty(BASE_HOST_FIELD);
       if (host.startsWith("http")) {
           host = host.replace("https://", "").replace("http://", "");
       }
       host = "https://" + host;
       return host;
   }
Also, add the below methods to set up a rest client that can be easily used from within the operations. Note how we retrieve the username and password using the command we mentioned above
/**
    * transport library, this can be anything you want it to be.
    * @return the restClient
    */
   public RESTClient getRESTClient() {
       return new RESTClient(HttpClientBuilder.create().build(), getHttpContext());
   }

   private HttpClientContext getHttpContext() {
       HttpClientContext httpContext = HttpClientContext.create();
       httpContext.setCredentialsProvider(getCredentialsProvider());
       return httpContext;
   }

   private CredentialsProvider getCredentialsProvider() {
       CredentialsProvider credsProvider = new BasicCredentialsProvider();
       credsProvider.setCredentials(AuthScope.ANY,
               new UsernamePasswordCredentials(
getContext().getConnectionProperties().getProperty(USERNAME_FIELD),
getContext().getConnectionProperties().getProperty(PASSWORD_FIELD)));
       return credsProvider;
   }
Add also a definition for a utility method to convert a stream to a string. We’ll be using that later as well
/**
    * Utility to convert InputStream to String
    * @param is
    * @return
    * @throws IOException
    */
   public static String inputStreamToString(InputStream is) throws IOException {
       try (BufferedReader buffer = new BufferedReader(new InputStreamReader(is)))
   {
           return buffer.lines().collect(Collectors.joining("\n"));
       }
   }
Imagine, all we’ve done until now is prep work! Next we’ll start the core implementation of the connector’s functionality, i.e, the code that will run once the documents enter the scope of the connector. Let’s start by implementing the operations one by one.
Implementing the Execute Operation
As we’ve seen in the configuration of the descriptor file, and the implementation of the connector file, the execute operation class will be invoked when the user selects the QUERY operation when configuring a connector in his process. Here, we’ll be implementing the logic that gets triggered in that operation.
First, add the following imports to the top of the ExecuteOperation.java file
import java.util.logging.Logger;
import java.util.logging.Level;
import org.json.JSONObject;
We need to add a dependency for the org.json component, so open the pom.xml and add the following dependency under the dependencies element.
<dependency>
           <groupId>org.json</groupId>
           <artifactId>json</artifactId>
           <version>20240205</version>
</dependency>
As we go, those versions used in the dependencies configuration might change, so try to always keep using the latest versions.
Ok, now we are ready to replace the executeUpdate implementation by the below one. We have included detailed commenting so that you would understand each of the steps involved
@Override
protected void executeUpdate(UpdateRequest updateRequest, OperationResponse operationResponse) {
       // Get the logger, used for logging purposes
       Logger logger   = operationResponse.getLogger();
       // Get the query parameter value defined in the descriptor, as per the user's selection in the operation
       String query = getContext().getOperationProperties().getProperty("query");
       CloseableHttpResponse response = null;
       RESTClient client = null;
       String responseString = null;
       String message = null;
       // Since we are issuing a GET request, we neglect all incoming documents and only get a reference to one
       // So that we don't issue a GET request for each incoming document
       ObjectData input = updateRequest.iterator().next();
       // Get a reference to the dynamic properties defined in the descriptor file
       Map<String, String> dynamicProps    = input.getDynamicProperties();
       // Get the value of the source dynamic document property, as set by the user in the process
       String source = dynamicProps.get("source");
       try {
           // Set the URL
           String uri = getConnection().getHost() + "/orders";
           // Create a GET request, add a source header and the query param as defined in the descriptor
           HttpUriRequest httpRequest = RequestBuilder.create("GET")
                                                       .addHeader("source", source)
                                                       .addParameter("status", query)
                                                       .setUri(uri).build();
           logger.log(Level.INFO, "REQUEST: " + httpRequest.toString());
           client = getConnection().getRESTClient();
           // Call the API
           response = client.executeRequest(httpRequest);
           // Get the response status code
           int statusCode = response.getStatusLine().getStatusCode();
           // Save the response as string, use the utility function we previously defined in the Connection class
           responseString = getConnection().inputStreamToString(response.getEntity().getContent());
           // Instantiate the JsonObject in case we need to parse the JSON response
           JSONObject jsonresponse = new JSONObject(responseString);
           // Not used here, however if the API returns back a status message, you can retrieve it and use it in the
           // connector result
           //message = jsonresponse.getString("some_element");
           if (statusCode >= 200 && statusCode < 300) {
               message = "OK";
               if (!responseString.contains("[]")) {
                   // Return success and continue processing with the API response data
                   operationResponse.addResult(input, OperationStatus.SUCCESS, String.valueOf(statusCode), message, PayloadUtil.toPayload(responseString));
               } else {
                   // In case the API returns an empty array
                   logger.log(Level.INFO, "EMPTY RESPONSE: " + responseString);
                   // Return success but stop further processing. Documents stop at this stage and don't continue
                   // further in the process
                   ResponseUtil.addEmptySuccess(operationResponse, input,
                       String.valueOf(response.getStatusLine().getStatusCode()));
               }
           } else {
               message = "FAILURE";
               logger.log(Level.SEVERE, "API ERROR: " + responseString);
               // Use APPLICATION_ERROR Operation Status instead of FAILURE to allow setting as
               // per the operation's "Error Behavior" property
               operationResponse.addResult(input, OperationStatus.APPLICATION_ERROR, String.valueOf(statusCode), message, PayloadUtil.toPayload(responseString));
           }
       } catch (Exception e) {
           logger.log(Level.SEVERE, "CONNECTOR EXCEPTION: " + e.toString());
           ResponseUtil.addExceptionFailure(operationResponse, input, e);
       } finally {
           IOUtil.closeQuietly(response, client);
           logger.log(Level.INFO, "FINISHED PROCESSING...");
       }
   }
This should be enough to invoke the external service and return an appropriate response based on the external API response.
Implementing the Create Operation
Similar to the Execute operation, we’ll implement the create operation to create a new record using the target’s API post method. We’ll replace the executeUpdate implementation by the one below
@Override
protected void executeUpdate(UpdateRequest updateRequest, OperationResponse operationResponse) {
       Logger logger   = operationResponse.getLogger();
       PayloadMetadata metadata    = operationResponse.createMetadata();
       String responseString = null;
       String message = null;
       Map<String, String> dynamicProps    = null;
       String source = null;

       // For all of the incoming documents, perform a POST to create a record
       RESTClient client = null;

       for (ObjectData data : updateRequest) {
           // Get a reference to the dynamic properties defined in the descriptor file
           dynamicProps    = data.getDynamicProperties();
           // Get the value of the source dynamic document property, as set by the user in the process
           source = dynamicProps.get("source");
           CloseableHttpResponse response = null;
           InputStream dataStream = null;

           try {
               // fetch the document data as a stream
               dataStream = data.getData();
               String uri = getConnection().getHost() + "/orders";
               // Create a POST request, add a source header from the document property
               HttpUriRequest request = RequestBuilder.create("POST")
                                                       .addHeader("source", source)
                                                       .setUri(uri).setEntity(
                                       new RepeatableInputStreamEntity(dataStream, data.getDataSize()) {
                                       }).build();
               logger.log(Level.INFO, "REQUEST: " + request.toString());
               client = getConnection().getRESTClient();
                // Call the API
               response = client.executeRequest(request);
               InputStream responseStream = response.getEntity().getContent();
               // Save the response as string, use the utility function we previously defined in the Connection class
               responseString = getConnection().inputStreamToString(responseStream);
               // Get the response status code
               int statusCode = response.getStatusLine().getStatusCode();
               // Instantiate the JsonObject to parse the JSON response
               JSONObject jsonresponse = new JSONObject(responseString);
               // The API returns back a status message, retrieve it and use it in the connector result
               message = jsonresponse.getString("message");
               if (statusCode >= 200 && statusCode < 300) {
                   operationResponse.addResult(data, OperationStatus.SUCCESS, String.valueOf(statusCode), message, PayloadUtil.toPayload(responseString));
               } else {
                   // Unsuccessful call, return status code of why
                   logger.log(Level.SEVERE, "API ERROR: " + responseString);
                   // Use APPLICATION_ERROR Operation Status instead of FAILURE to allow setting as per the operation's "Error Behavior" property
                   operationResponse.addResult(data, OperationStatus.APPLICATION_ERROR, String.valueOf(statusCode), message, PayloadUtil.toPayload(responseString));
               }
           } catch (Exception e) {
               logger.log(Level.SEVERE, "CONNECTOR EXCEPTION: " + e.toString());
               //Exception occurred, add failure.
               ResponseUtil.addExceptionFailure(operationResponse, data, e);
           } finally {
               IOUtil.closeQuietly(response, dataStream);
               logger.log(Level.INFO, "FINISHED PROCESSING...");
           }
       }
       IOUtil.closeQuietly(client);
   }
Implementing the Get Operation
Last operation to implement is the Get operation that will be used to get a single order. Open the GetOperation.java file and replace the executeGet method with the below one.
@Override
protected void executeGet(GetRequest request, OperationResponse operationResponse) {
       //Fetch the object ID
       ObjectIdData objectId = request.getObjectId();
       Logger logger   = operationResponse.getLogger();
       CloseableHttpResponse response = null;
       RESTClient client = null;
       String responseString = null;
       String message = null;

       try {
           String uri = getConnection().getHost() + "/orders/" + objectId.getObjectId();
           // Create the GET request
           HttpUriRequest httpRequest = RequestBuilder.create("GET").setUri(uri).build();
           client = getConnection().getRESTClient();
           // Call the API
           response = client.executeRequest(httpRequest);
           // Get the response status code
           int statusCode = response.getStatusLine().getStatusCode();
           // Save the response as string, use the utility function we previously defined in the Connection class
           responseString = getConnection().inputStreamToString(response.getEntity().getContent());
           // Instantiate the JsonObject in case we need to parse the JSON response
           JSONObject jsonresponse = new JSONObject(responseString);
           // Not used here, however if the API returns back a status message, you can retrieve it and use it in the
           // connector result
           //message = jsonresponse.getString("some_element");
           if (statusCode >= 200 && statusCode < 300) {
               message = "OK";
               if (!responseString.contains("{}")) {
                   // Return success and continue processing with the API response data
                   operationResponse.addResult(objectId, OperationStatus.SUCCESS, String.valueOf(statusCode), message, PayloadUtil.toPayload(responseString));
               } else {
                   // In case the API returns an empty array
                   logger.log(Level.INFO, "EMPTY RESPONSE: " + responseString);
                   // Return success but stop further processing. Documents stop at this stage and don't continue
                   // further in the process
                   ResponseUtil.addEmptySuccess(operationResponse, objectId,
                       String.valueOf(response.getStatusLine().getStatusCode()));
               }
           } else {
               message = "FAILURE";
               logger.log(Level.SEVERE, "API ERROR: " + responseString);
               // Use APPLICATION_ERROR Operation Status instead of FAILURE to allow setting as
               // per the operation's "Error Behavior" property
               operationResponse.addResult(objectId, OperationStatus.APPLICATION_ERROR, String.valueOf(statusCode), message, PayloadUtil.toPayload(responseString));
           }
       } catch (Exception e) {
           ResponseUtil.addExceptionFailure(operationResponse, objectId, e);
       } finally {
           IOUtil.closeQuietly(response, client);
       }
   }
Finally, build the project again using the maven clean install command to verify there’s no compilation errors.
Step 5: Test the Connector
Before deploying the connector, it’s a good idea to unit test your code from within the IDE. To do that, perform the following:
- Add the below dependency to the pom.xml file
<dependency>
           <groupId>com.boomi.connsdk</groupId>
           <artifactId>connector-sdk-test-util</artifactId>
</dependency>- Create a test file under the test directory and populate it with test methods for each operation as follows:
@Test
public void testGetOperation() throws Exception
   {
       DemoConnector connector = new DemoConnector();
       ConnectorTester tester = new ConnectorTester(connector);
       // setup the operation context for a GET operation
       Map<String, Object> connProps = new HashMap<String, Object>();
       connProps.putIfAbsent("host", "your_api_host");
       connProps.putIfAbsent("username", "test");
       connProps.putIfAbsent("password", "test");
       Map<String, Object> opProps = new HashMap<String, Object>();
       tester.setOperationContext(OperationType.GET, connProps, opProps, "ORD001", null);
       List<SimpleOperationResult> results = tester.executeGetOperation("ORD001");

       for (SimpleOperationResult result : results) {
           assertEquals("Wrong result", OperationStatus.SUCCESS, result.getStatus());
       }
   }

   @Test
   public void testExecuteOperation() throws Exception
   {
       DemoConnector connector = new DemoConnector();
       ConnectorTester tester = new ConnectorTester(connector);

       // setup the operation context for a GET operation
       Map<String, Object> connProps = new HashMap<String, Object>();
       connProps.putIfAbsent("host", "your_api_host");
       connProps.putIfAbsent("username", "test");
       connProps.putIfAbsent("password", "test");
       Map<String, Object> opProps = new HashMap<String, Object>();
       opProps.putIfAbsent("query", "successes");
       tester.setOperationContext(OperationType.EXECUTE, connProps, opProps, null, null);
       // Create the list of input streams, needed as an input for the Execute operation
       String testinput = "not_needed";
       InputStream targetStream = new ByteArrayInputStream(testinput.getBytes());
       List<InputStream> list = new ArrayList<InputStream>();
       list.add(targetStream);
       List<SimpleOperationResult> results = tester.executeExecuteOperation(list);

       for (SimpleOperationResult result : results) {
           assertEquals("Wrong result", OperationStatus.SUCCESS, result.getStatus());
       }
   }

   @Test
   public void testCreateOperation() throws Exception
   {
       DemoConnector connector = new DemoConnector();
       ConnectorTester tester = new ConnectorTester(connector);
       // setup the operation context for a GET operation
       Map<String, Object> connProps = new HashMap<String, Object>();
       connProps.putIfAbsent("host", "your_api_host");
       connProps.putIfAbsent("username", "test");
       connProps.putIfAbsent("password", "test");
       Map<String, Object> opProps = new HashMap<String, Object>();
       tester.setOperationContext(OperationType.CREATE, connProps, opProps, null, null);
       // Create the list of input streams, needed as an input for the Execute operation
       String testinput = "{\"order_number\":\"ORD001\",\"customer_id\":\"CUST001\",\"customer_name\":\"Alice Smith\",\"order_date\":\"2024-03-01T09:30:00Z\",\"total_amount\":149.99,\"status\":\"Processing\",\"payment_method\":\"Credit Card\",\"shipping_method\":\"Standard\"}";

       InputStream targetStream = new ByteArrayInputStream(testinput.getBytes());
       List<InputStream> list = new ArrayList<InputStream>();
       list.add(targetStream);
       List<SimpleOperationResult> results = tester.executeCreateOperation(list);

       for (SimpleOperationResult result : results) {
           assertEquals("Wrong result", OperationStatus.SUCCESS, result.getStatus());
       }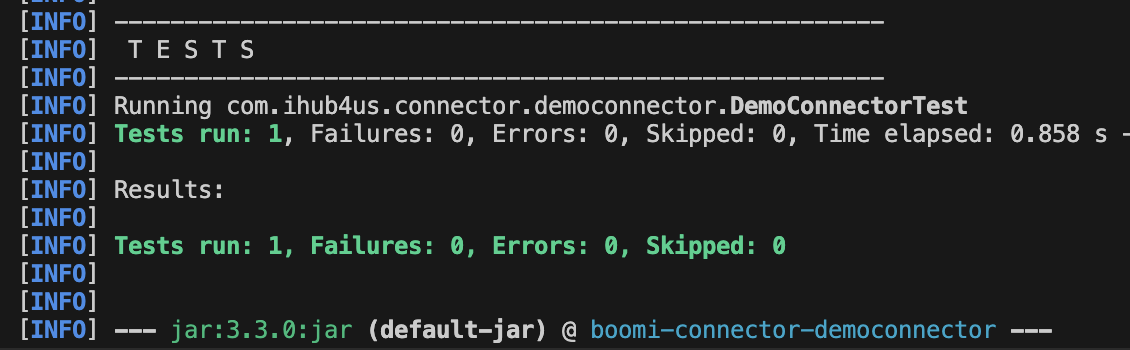
}- Compiling the project using the mvn clean install command would run all the tests before generating the packages.
Another option is to right-click any method and select “Debug Java”, this will allow you to step into the code and trace it step-by-step. Don’t forget to set some breakpoints along the way.

Step 6: Deploy the Connector
Deployment of the connector is the standard one as explained in Boomi’s official article. However, again, for completeness, here’s the steps you need to perform:
- Ensure you build the project to compile the latest version of your changes
mvn clean install
- Copy two files into a separate directory. The zip archive generated, and the descriptor file. This is an optional step, however, we always like to copy them to a deployment-specific folder.

- Head to Boomi platform now, into the Settings >> Developer page
- If no suitable connector group exists, create a connector group, and select the descriptor and archive file you saved in the previous step

- Click Ok
- For any subsequent installations (any bug fixes, improvements), you can click on the “Add Version” button and reselect the updated descriptor and archive files

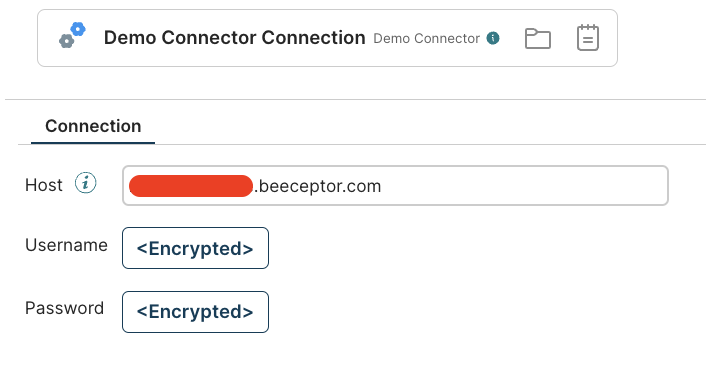
- Now you can go on and use the connector similar to any other out-of-the-box connector. Here’s we’re creating a connection and setting it’s properties
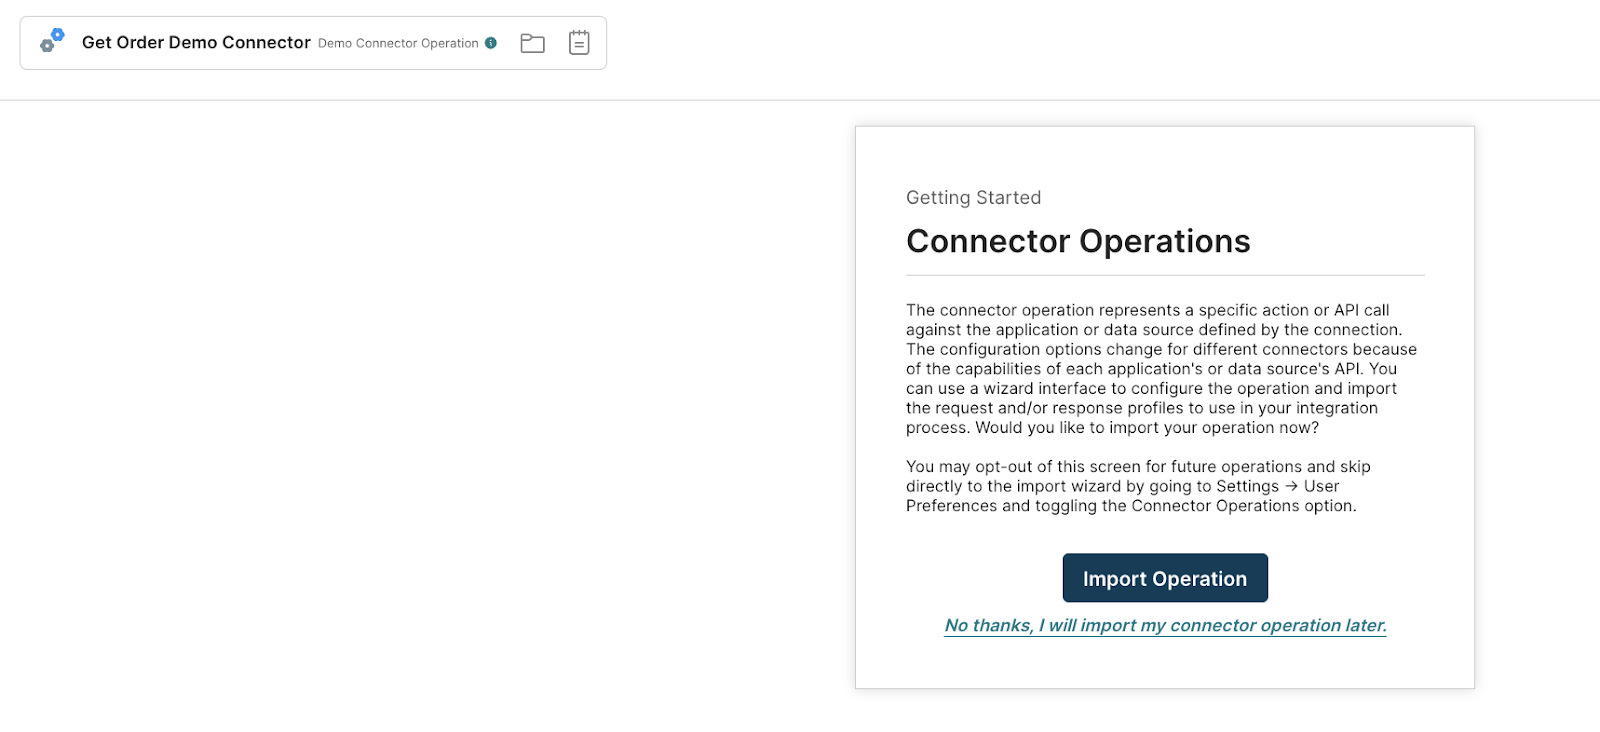
- Here, we’re creating a GET operation. Click the Import Operation to test the Browse functionality we implemented
- After selecting the Atom, you will be presented with the available object types, which is the result of your implementation of the “getObjectTypes” browser method. Select “Order” in this case and click “Next”

- Click finish to invoke the “getObjectDefinitions” method and generated the order profile
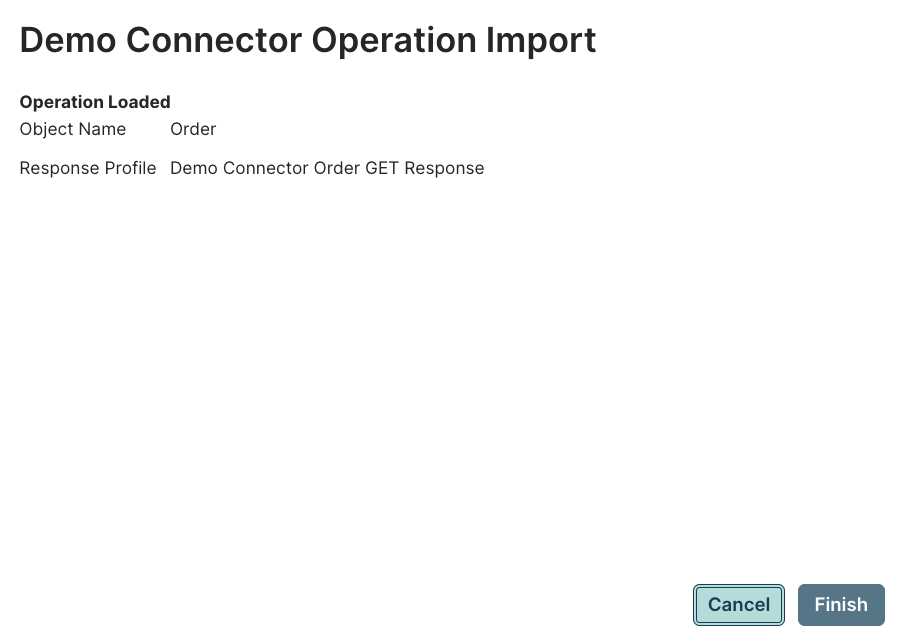
- Here’s the order profile generated

- Similarly, you can create the query and insert operations. Here, we’re running the Query operation and retrieving the results

- Here, we’ve created a sample process that tests the three operations created within our connector

- We can also view the logs to see the connector-specific log messages we printed out in our implementation

- Finally, let’s inspect the document property we created in the descriptor file. We can set that via a “Set Properties” shape as you can see below


Conclusion
In this guide, we went above and beyond to provide a full implementation of a Boomi custom connector covering a lot of details around the implementation and covering a lot of aspects that you would normally need a lot of research and many articles to cover. We grouped all that in a single guide that you can use as a reference for any future development of any Boomi custom connector. Better off, we’ve attached the custom connector implementation here, to make your life easier and give you a kickstart to any custom connector you might need to create. Hope you have enjoyed it. Happy learning!