In this article, we will explain how to expose an Export as an API in Celigo. Recall that in Celigo, the components which retrieve data from sources are called “Exports”, while components which send data to destinations are called “Imports”. More on that was explained in our previous article Creating your first Celigo Integration. These exports and imports are reusable components that you can reuse across different flows and can even expose as standalone APIs.
In the next sections, we will create a brand new export, then follow a series of steps to showcase how we can expose this export as an API. The export will be a simple one which extracts all customers from Shopify.
Step 1: Create the Export
As explained before, exports can be created while creating a flow, however, they can also be created in isolation from the Exports page in the left menu. To do that, navigate to the exports page and click “+ Create export” from the top right corner of the page

Populate the export general information as below and click “Next”

Configure the export as shown below, preview the data exported and click “Save and Close” when done. Take a note of the Invoke URL in the “Advanced” section. This is one of the options to invoke the export directly using an HTTP call. We’ll showcase how to do that in this article, but we’ll also create an API which allows us more flexibility in how to expose this export. Also, take note of the export id shown in the export URL, we’ll need that later.

That’s it, after saving, the export is created and ready to be exposed as an API. Let’s go to the next steps now.
Step 2: Create the Script
Before creating an API, we need to create a script to invoke the export. Then later the API will use this script. To do that, navigate to the Scripts page from the left hand menu and click “+ Create Script” as shown below.

Populate the Script info as shown below, then save and close.

Here’s the script shown above in the snapshot. Don’t forget to replace the id by the export id copied in Step 1.
import { exports } from 'integrator-api'
function _mainExport (options) {
  let response = {};
  let invokeExportResponse;
  let exportResponse;
  // Execute the export
  try {
    invokeExportResponse = exports.run({_id:'••••••••••••••••••••••••'});
    response.statusCode = 200;
  } catch(e) {
    invokeExportResponse = JSON.stringify(e);
    response.statusCode = 400;
  }
  // Create body response
 response.body = {
   exportResponse: invokeExportResponse
 }
  return {
    statusCode: response.statusCode,
    headers: { },
    body: response.body
  }
}
Step 3: Create the API
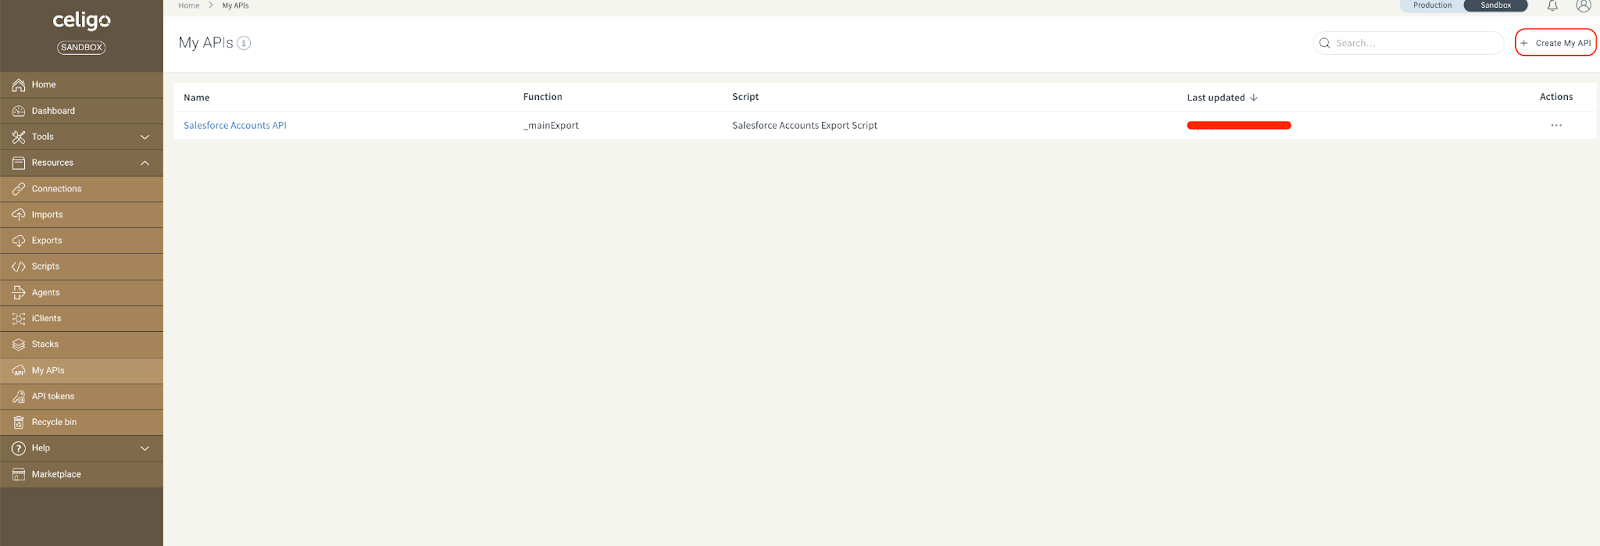
Now that the script is created, we can create our API. To do that, navigate to the My APIs section in the left menu and click “+ Create My API”
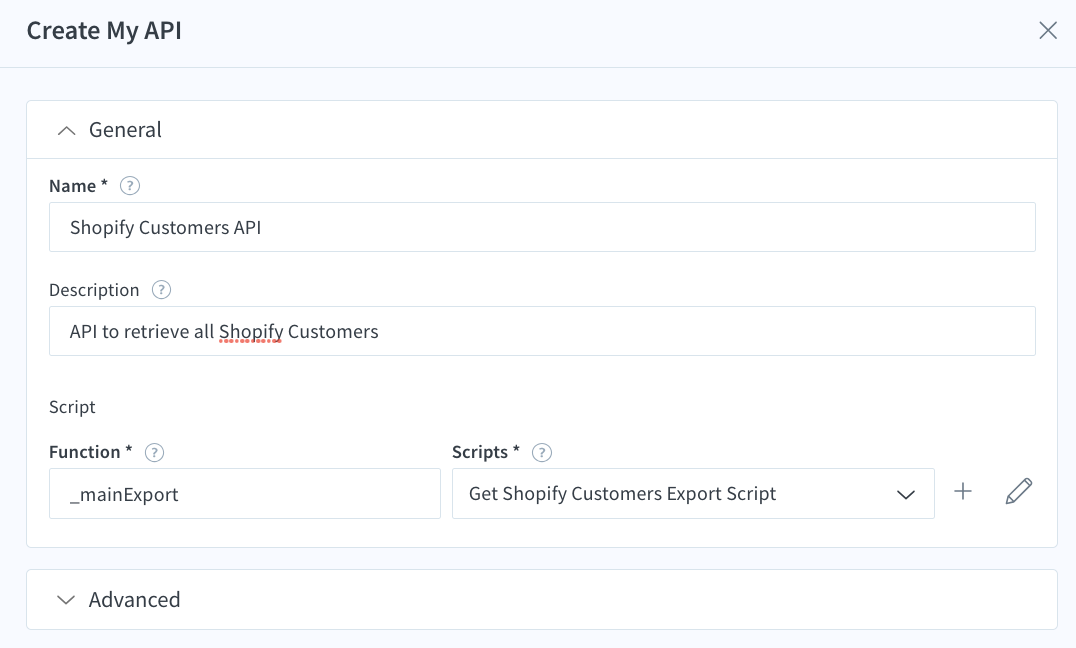
Populate the API details, select the script created in Step 2, fill in the main function name used in the script, then save the API.
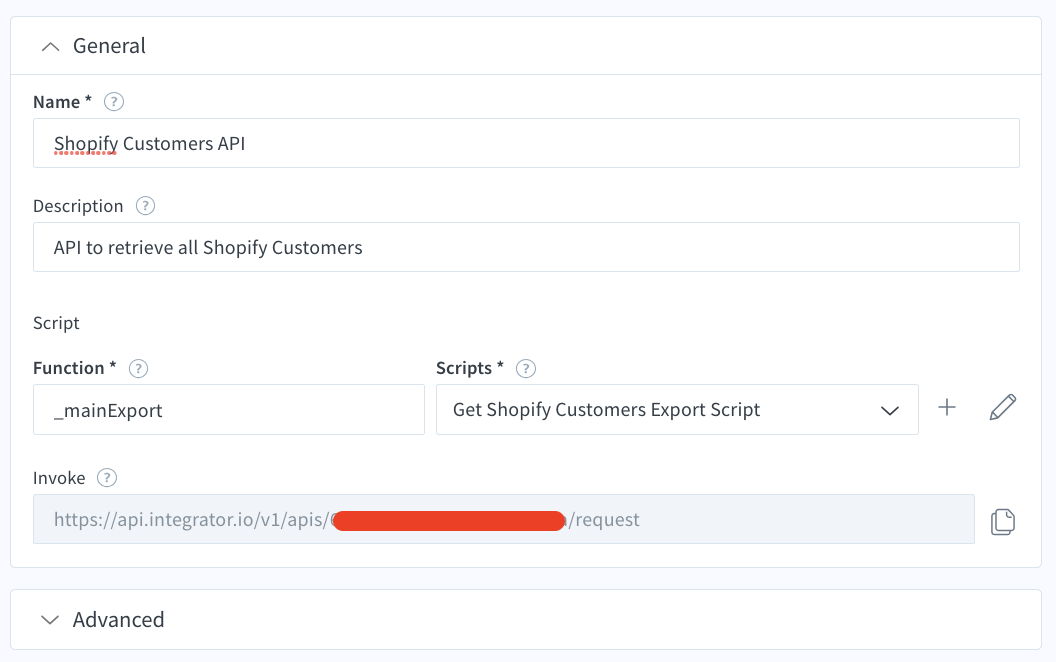
Once you save, the invoke URL will be generated. Take note of this URL as we’ll need it to invoke the API later in this article.
Step 4: Create an API Token
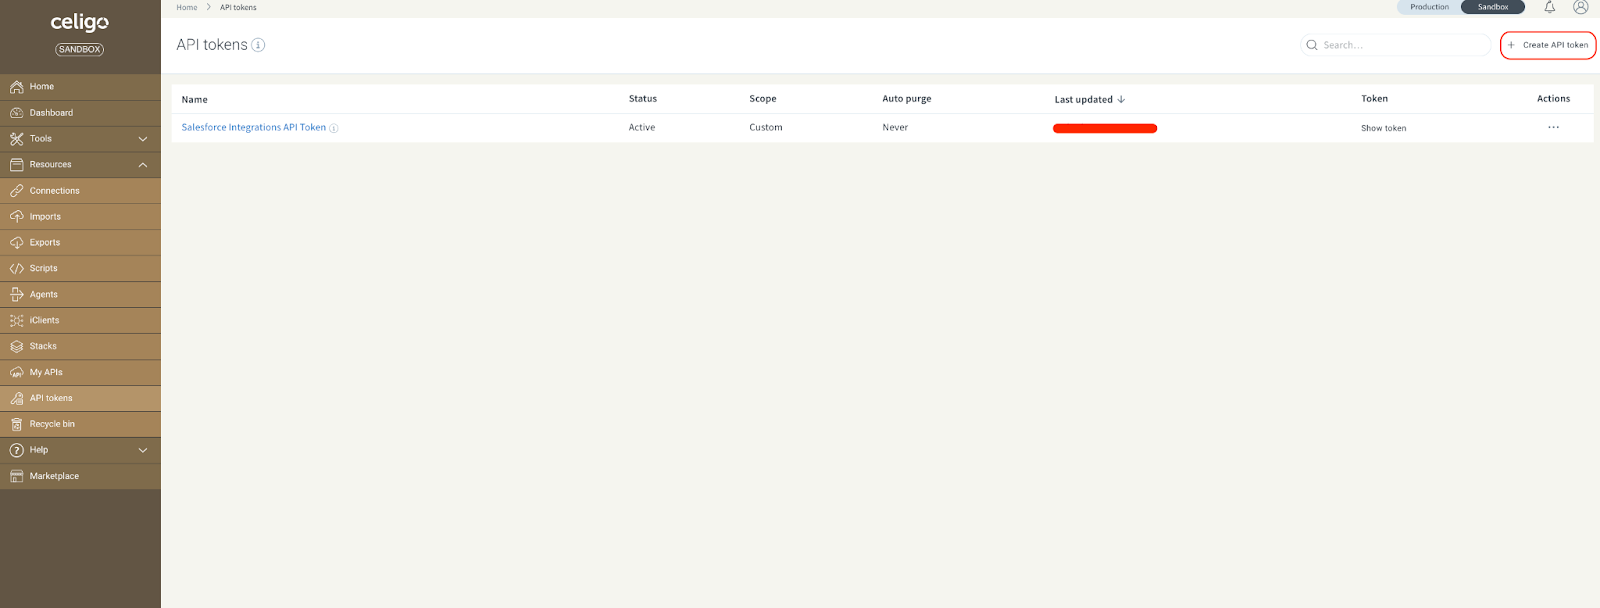
Before we can invoke the API, we need to create an API token (if you haven’t created once previously). To do that, navigate to the API Tokens section in the left menu and click “+ Create API token”
Note: Only account owners and admins with Developer mode enabled can create API tokens.
Populate the general information about the API token, its access permissions as shown below, then save and close

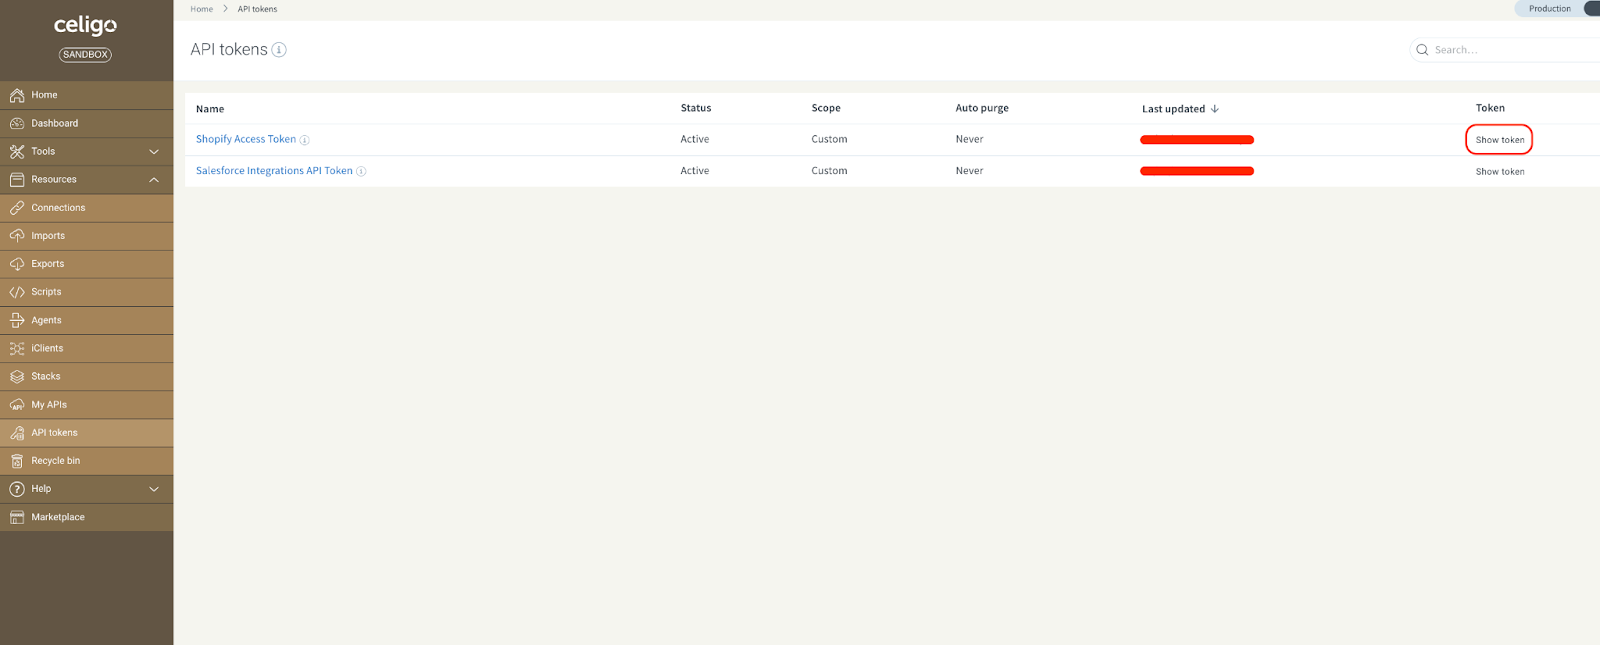
The newly created token will be displayed along any other previously created API tokens. Click the show token link then take a note of the displayed token. This is the bearer token that you can use to secure the invocation of your API
Step 5: Invoke the API
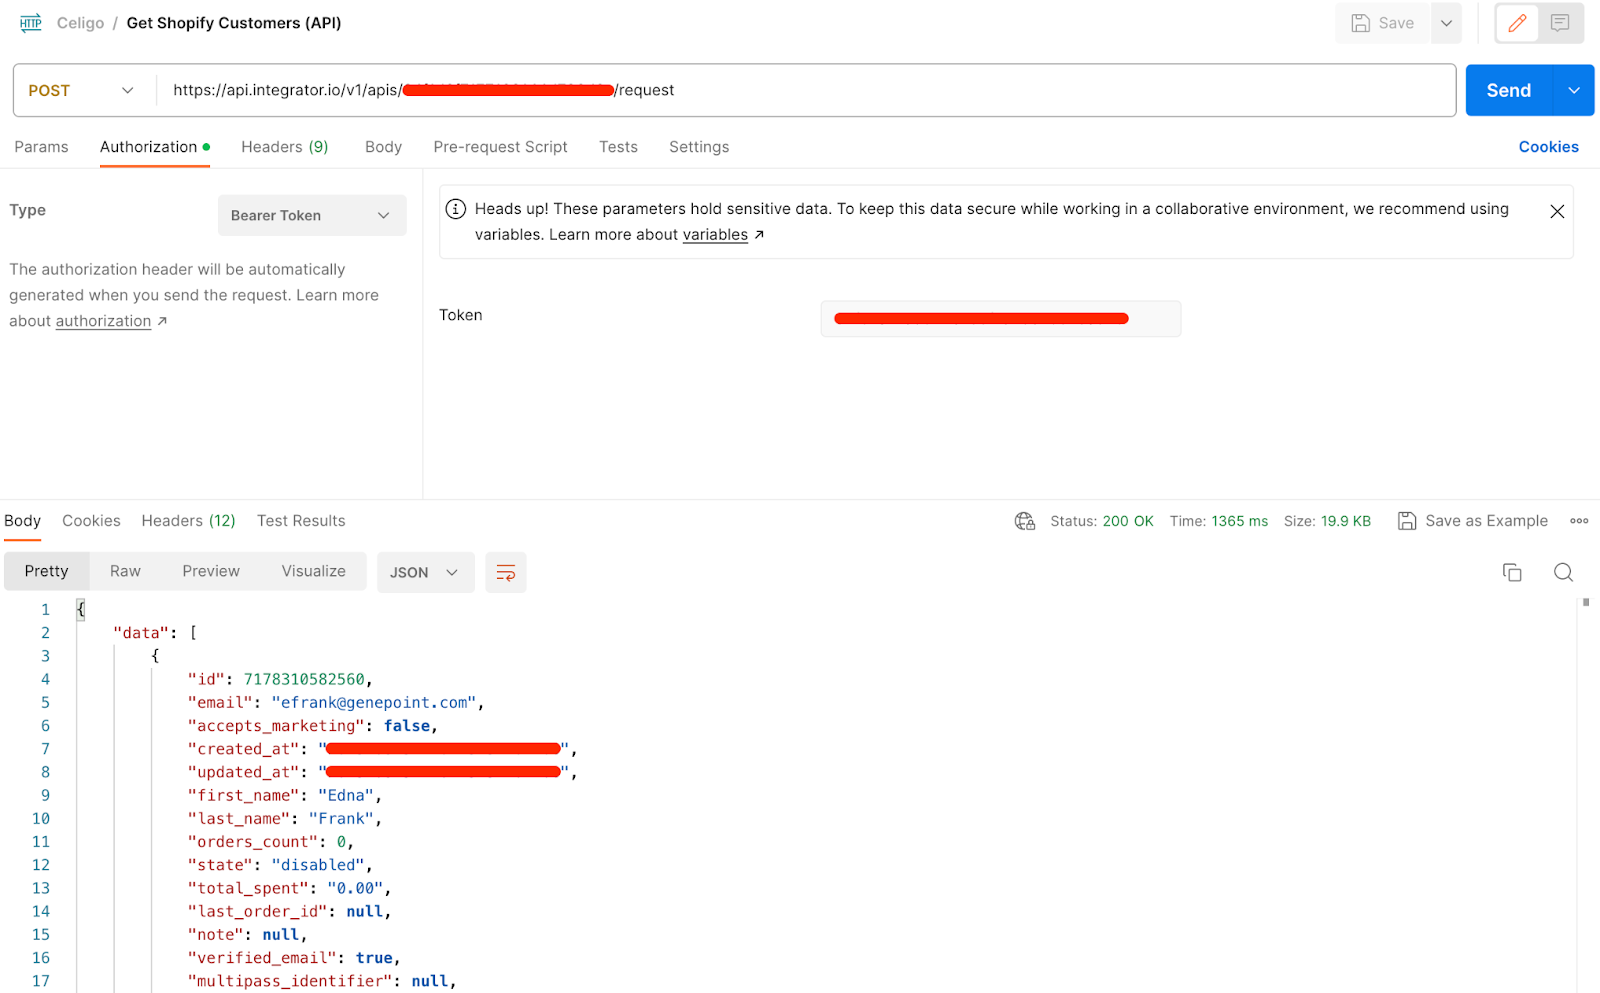
Finally, we are ready to invoke our API. First we’ll invoke the export directly using the export invoke url we copied in Step 1. To do that, we are going to use Postman. Open it, create a request, configure it as shown below, then click “Send” to receive the response from the API.

Now we’ll do the same, but using the API URL we copied in Step 3. Note that the response is similar to the previous but is now wrapped in an “exportResponse” element.

Since creating an API gives us flexibility in modifying the request and response of our invocation, let’s take advantage of that to change the response to exactly mimic the one returned by the direct export URL. To do that, navigate back to the scripts section and modify the script as shown below.

Now, go back to Postman and retry the call to the API. The response should have changed as expected.
Conclusion
In this article, we have touched upon one of the API features of Celigo, we looked at how to create and expose an Export as an API in Celigo. We created an export, a script to run this export, then an API which uses this script, and finally an API token to secure access to the API. In future articles, we’ll look at how to expose an import and as well as a flow as an API. We’ll also look into how to expose a flow as a webhook.